Just a few days ago, the version alfa 2 of Ubuntu 11.10 was released. This version comes with some interesting changes, may be the most significant of them are the use of the branch 3 of the Linux kernel, as well as the use of Gnome 3.
As you probably already know, multiseat is closely related to display manager, since it is a key component which allows the starting of multiple simultaneous graphical sessions. You probably will know, too, that this feature was removed in gdm (the Gnome Display Manager) in version 2.22. This is the reason why since Ubuntu 9.10 there is no an easy setup to configure a multiseat computer.
In Ubuntu 11.10 LightDM has replaced GDM as the default display manager. This is a rather new display manager, so the first question was whether this new display manager would support a multiseat configuration. The question seems to have been answered and, accordingly to the comments, multiseat configurations will be possible.
We are currently preparing a computer with the alfa 2 of Ubuntu 11.10 just to test the multiseat setup. We will keep you informed about the results on the blog.
Meanwhile, you can have a look to the new features of Ubuntu 11.10
Showing posts with label multiseat. Show all posts
Showing posts with label multiseat. Show all posts
Sunday, July 10, 2011

Thursday, July 16, 2009
Multiseat with nVidia card
A new configuration of the dual seat system has been tested with a different hardware.
Computer: HP dc7700 ultra-slim 1GB RAM, 250GB HD
The computer comes with an integrated Intel graphics card:
Unfortunately, this card has only one output, so we had to replace the original card. We added another one, in particular one suggested by HP (we are limited since this is a small form factor PC with important limitations in the physical size of PCI cards).
We added a PCIe nVidia card with dual output:
First of all, we encountered some problems:
Once installed the new card, we were unable to boot the live version of Ubuntu 9.04. We had to revert back to the intel card, install the Ubuntu distribution, then plug the nVidia card and finally boot the computer with the system already installed. Doing the installation in this way everything worked properly and we were able to continue with the setup of the dual seat system.
In order to setup the nVidia cards, we choose to use the proprietary drivers (
The tool nvidia-settings is useful to generate the proper

In our particular case, this is the xorg.conf generated file
Having done these changes, the rest of the setup is just the same as with the ATI graphics card.
The seats now do support glx functions (glxgears, screensavers, and so)
Computer: HP dc7700 ultra-slim 1GB RAM, 250GB HD
The computer comes with an integrated Intel graphics card:
$ lspci | grep VGA
00:02.0 VGA compatible controller: Intel Corporation 82Q963/Q965 Integrated Graphics Controller (rev 02)
Unfortunately, this card has only one output, so we had to replace the original card. We added another one, in particular one suggested by HP (we are limited since this is a small form factor PC with important limitations in the physical size of PCI cards).
We added a PCIe nVidia card with dual output:
$ lspci | grep VGA
01:00.0 VGA compatible controller: nVidia Corporation Quadro NVS 290 (rev a1)
First of all, we encountered some problems:
Once installed the new card, we were unable to boot the live version of Ubuntu 9.04. We had to revert back to the intel card, install the Ubuntu distribution, then plug the nVidia card and finally boot the computer with the system already installed. Doing the installation in this way everything worked properly and we were able to continue with the setup of the dual seat system.
In order to setup the nVidia cards, we choose to use the proprietary drivers (
nvidia-glx-180 and two dependent packages: nvidia-180-libvdpau, nvidia-180-modaliases) and we also installed the package nvidia-settingsThe tool nvidia-settings is useful to generate the proper
xorg.conf. We need this file to tell the system that we are going to have a multihead setup.
In our particular case, this is the xorg.conf generated file
# nvidia-settings: X configuration file generated by nvidia-settings
# nvidia-settings:  version 1.0  (buildd@palmer)  Sun Feb  1 20:21:04 UTC 2009

Section "ServerLayout"
    Identifier     "Layout0"
    Screen      0  "Screen0" 0 0
    InputDevice    "Keyboard0" "CoreKeyboard"
    InputDevice    "Mouse0" "CorePointer"
EndSection

Section "Files"
EndSection

Section "Module"
    Load           "dbe"
    Load           "extmod"
    Load           "type1"
    Load           "freetype"
    Load           "glx"
EndSection

Section "ServerFlags"
    Option         "Xinerama" "0"
EndSection

Section "InputDevice"
    # generated from default
    Identifier     "Mouse0"
    Driver         "mouse"
    Option         "Protocol" "auto"
    Option         "Device" "/dev/psaux"
    Option         "Emulate3Buttons" "no"
    Option         "ZAxisMapping" "4 5"
EndSection

Section "InputDevice"
    # generated from default
    Identifier     "Keyboard0"
    Driver         "kbd"
EndSection

Section "Monitor"
    # HorizSync source: edid, VertRefresh source: edid
    Identifier     "Monitor0"
    VendorName     "Unknown"
    ModelName      "LG L1953HM"
    HorizSync       30.0 - 83.0
    VertRefresh     56.0 - 75.0
    Option         "DPMS"
EndSection

Section "Device"
    Identifier     "Device0"
    Driver         "nvidia"
    VendorName     "NVIDIA Corporation"
    BoardName      "Quadro NVS 290"
EndSection

Section "Screen"
    Identifier     "Screen0"
    Device         "Device0"
    Monitor        "Monitor0"
    DefaultDepth    24
    Option         "TwinView" "1"
    Option         "TwinViewXineramaInfoOrder" "CRT-0"
    Option         "metamodes" "CRT-0: 1280x1024 +0+0, CRT-1: 1280x1024_60 +0+1024"
    SubSection     "Display"
        Depth       24
EndSection

Section "Device"
    Identifier     "Device0"
    Driver         "nvidia"
    VendorName     "NVIDIA Corporation"
    BoardName      "Quadro NVS 290"
EndSection

Section "Screen"
    Identifier     "Screen0"
    Device         "Device0"
    Monitor        "Monitor0"
    DefaultDepth    24
    Option         "TwinView" "1"
    Option         "TwinViewXineramaInfoOrder" "CRT-0"
    Option         "metamodes" "CRT-0: 1280x1024 +0+0, CRT-1: 1280x1024_60 +0+1024"
    SubSection     "Display"
        Depth       24
    EndSubSection
EndSection
Having done these changes, the rest of the setup is just the same as with the ATI graphics card.
The seats now do support glx functions (glxgears, screensavers, and so)
Thursday, June 18, 2009
Multiseat in Ubuntu 9.04
Multiseat configuration in Ubuntu 9.04 is very similar to that of Ubuntu 8.04. Some software components have been updated, so the overall system has some improvements over the previous version, while other problems are still remaining.

The computer is just identical to that used in the previous version:
Pentium 4 at 3GHz, 512MB of RAM and a 80GB hard disk. The video card is an ATI Radeon X300 PCIe by Gigabyte with two outputs (VGA and DVI). On the DVI output we have a DVI to VGA converter so we can connect two simple VGA analog monitors. The monitors are just two generic TFT/LCD displays with a resolution of 1280x1024.
1.- We install the Ubuntu 9.04 version on the computer. You can do this using a live-media, such as a live-CD/live-DVD or a live-USB. Since most of the computers today support booting from USB, we recommend you to choose the USB option. The installation process will be much faster compared to installing from a CD/DVD.
2.- Update your system to the latest available packages. You can do that either using the graphical tools (update manager / synaptic) or using the command line in a terminal:
3.- Install some additional components (xserver-xephyr and wmctrl). These are not included in the default installation, but they are in the official repositories. These packages are necessary in order to obtain the desired multiseat system.
Before starting any modifications related to the multiseat configuration, you should do the necessary adjustments and setup for your particular scenario (network configuration, user creation, etc). Some tools and applications related to Gnome configuration do not work when the user is logged in a multiseat session, because the operating system detect multiple gnome-sessions and some of the system configuration tools are not able to create the necessary locks.
It is very convenient to maintain a copy of the original configuration of the two files (/etc/X11/xorg.conf and /etc/gdm/gdm.conf) that are going to be modified, since they can be necessary if you want to come back to the initial configuration.
Once configured your network and created your users (we suggest you creating something like user1/user2, uleft/uright if you are going to have generic users) you can proceed with the process of multiseat setup.
Initially, after the default installation, the system will start with the two displays in "clone" mode.
If we have a look at the output of the xrandr command, we will see the details about our current setup. In our particular case, we obtain this output:
Next thing, we edit /etc/X11/xorg.conf to indicate how to obtain an "extended desktop" configuration. If you have any doubts on this topic, you can find additional information on the official Ubuntu wiki: manual multihead setup.
On recent Linux versions, several things related to device management are being changed and moved to other parts of the system, such as hal and udev, so we can see that there is no need to indicate anything related to keyboard and mouse in the xorg.conf file.
After having done a backup of the original xorg.conf file, we modify it in order to indicate the new setup with two monitors. We also include some convenient options (section "ServerFlags") in a multiseat system.
Notice that this time, we have defined a vertical setup of the monitors. This is just to test if 3D acceleration works with horizontal and vertical dimensions of the virtual screen lower (or equal) than 2048 pixels. If you feel more comfortable with an horizontal setup, just use leftOf or rightOf instead of below, and change the virtual size to the proper one according to the desired layout.
After having done this change, if we restart the X server we will see a vertical desktop with these characteristics:
Once we have modified the xorg.conf file and having already obtained a big desktop covering the two monitors (either with an horizontal or with a vertical layout), the next thing is to configure gdm to launch two Xephyr sessions, one for every seat.
Previously, you will need to obtain the information related to the input events on your system.
In this case, we have a set of PS2 keyboard + mouse for one seat, and a pair of USB keyboard + mouse for the second one. The values that you are obtaining here will be used to configure the corresponding input device for every seat.
The next step is to create a launcher in order to execute Xephyr with the proper parameters and input events. To achieve that, we create a file that will be used as a launcher script. You can name the file and place it as you consider most appropriated. We have chosen to create it as /usr/sbin/Xephyr-path.sh
Use your favorite editor (vi, gedit, ...) to create it, and do not forget to make it executable by root (the file owner).
You should create a file with something like these contents (change the xkblayout parameter according to your language):
After the creation of this script, you can proceed with the modifications to the /etc/gdm/gdm.conf file.
On the [servers] section of gdm.conf, we comment out the rules corresponding to the original layout and define the new one. We modify the file to create the base X server and two Xephyr sessions (one for every seat) over the base X.
Notice that this is the script where you will have to indicate what the input devices (their physical connections) are for every seat.
The second change to the gdm.conf file is related to the greeter. There are still things that need to be done manually.
We encounter the already known problem of having every Xephyr window properly placed (one Xephyr session appearing on every display). The current Xephyr version does not support the geometry parameter that most X applications include, so it is not possible to place the Xephyr window in the desired place. In order to circumvent this problem, we create a script that will be called instead of doing a direct call to the session greeter. Such script invokes some command line tools in order to place every Xephyr window just in the place where we want to have it. We will use the following command line tools: xwininfo, wmctrl to move one of the Xephyr sessions to the second monitor, so that they do not overlap anymore. That is the reason why we installed the wmctrl package.
In the [daemon] section of gdm.conf change the reference to the original greeter for a reference to a new script. This script, apart for invoking the greeter, will place properly every Xephyr window:
We will have to create the script responsible of the greeter/login (in our case, /usr/sbin/Xephyr-login.sh). This script will be executed by the gdm user, so we create a file owned by gdm and give execution permission just for that user.
After the creation of such script, it should look like this:
In our case, we move one of the sessions 1024 pixels vertically (remember that our layout consists of two 1280x1024 displays vertically aligned).
As you can see, when the greeter is expected to be invoked, the wrapper script (including greeter invocation) is executed instead. The user(s) finally sees every greeter in a different display and the rest of the process is almost unnoticeable.
The last comment is about the greeter. The old style gdmlogin was some time ago replaced by a more modern gdmgreeter. There is something wrong about screen size detection with this default gdm greeter (gdmgreeter). It always try to start at a resolution of 1600x1200, so we had to change to the old greeter (gdmlogin) which detects properly the screen resolutions of the Xephyr sessions.
Maybe gdmgreeter uses xrandr to detect the resolution of every Xephyr session, since 1600x1200 is the max output reported by xrandr on every Xephyr session. The Xephyr windows are in fact resizable by means of xrandr, so we are not sure if this is a bug of xrandr that sould only report the current size, or a bug of gdmgreeter assuming that it must change the window size to the biggest available.
In order to avoid this problem, we use gdmlogin instead of gdmgreeter.
The Ubuntu 9.04 version of the multiseat setup, achieves some improvements over previous versions:
* Mouse wheel works properly.
* Keyboard led indicators are not messed up.
Updated 2009/06/22: Some minor changes
Updated 2009/07/16: Some changes in Xephyr-path.sh and Xephyr-login.sh
Access control is now enabled in both Xephyr sessions. The previous configuration had access control disabled (-ac option).
The computer is just identical to that used in the previous version:
Pentium 4 at 3GHz, 512MB of RAM and a 80GB hard disk. The video card is an ATI Radeon X300 PCIe by Gigabyte with two outputs (VGA and DVI). On the DVI output we have a DVI to VGA converter so we can connect two simple VGA analog monitors. The monitors are just two generic TFT/LCD displays with a resolution of 1280x1024.
1.- We install the Ubuntu 9.04 version on the computer. You can do this using a live-media, such as a live-CD/live-DVD or a live-USB. Since most of the computers today support booting from USB, we recommend you to choose the USB option. The installation process will be much faster compared to installing from a CD/DVD.
2.- Update your system to the latest available packages. You can do that either using the graphical tools (update manager / synaptic) or using the command line in a terminal:
$ sudo apt-get update
3.- Install some additional components (xserver-xephyr and wmctrl). These are not included in the default installation, but they are in the official repositories. These packages are necessary in order to obtain the desired multiseat system.
$ sudo apt-get install xserver-xephyr wmctrl
Before starting any modifications related to the multiseat configuration, you should do the necessary adjustments and setup for your particular scenario (network configuration, user creation, etc). Some tools and applications related to Gnome configuration do not work when the user is logged in a multiseat session, because the operating system detect multiple gnome-sessions and some of the system configuration tools are not able to create the necessary locks.
It is very convenient to maintain a copy of the original configuration of the two files (/etc/X11/xorg.conf and /etc/gdm/gdm.conf) that are going to be modified, since they can be necessary if you want to come back to the initial configuration.
Once configured your network and created your users (we suggest you creating something like user1/user2, uleft/uright if you are going to have generic users) you can proceed with the process of multiseat setup.
Initially, after the default installation, the system will start with the two displays in "clone" mode.
If we have a look at the output of the xrandr command, we will see the details about our current setup. In our particular case, we obtain this output:
$ xrandr -q
Screen 0: minimum 320 x 200, current 1280 x 1024, maximum 1280 x 1200
VGA-0 connected 1280x1024+0+0 (normal left inverted right x axis y axis) 338mm x 270mm
   1280x1024      60.0*+   75.0     60.0*
   1152x864       75.0
   1024x768       75.0     60.0
   832x624        74.6
   800x600        75.0     60.3
   640x480        75.0     59.9
   720x400        70.1
DVI-0 connected 1280x1024+0+0 (normal left inverted right x axis y axis) 338mm x 270mm
   1280x1024      60.0*+   75.0     60.0*
   1152x864       75.0
   1024x768       75.0     70.1     60.0
   832x624        74.6
   800x600        72.2     75.0     60.3
   640x480        75.0     72.8     59.9
   720x400        70.1
S-video disconnected (normal left inverted right x axis y axis)
Next thing, we edit /etc/X11/xorg.conf to indicate how to obtain an "extended desktop" configuration. If you have any doubts on this topic, you can find additional information on the official Ubuntu wiki: manual multihead setup.
On recent Linux versions, several things related to device management are being changed and moved to other parts of the system, such as hal and udev, so we can see that there is no need to indicate anything related to keyboard and mouse in the xorg.conf file.
After having done a backup of the original xorg.conf file, we modify it in order to indicate the new setup with two monitors. We also include some convenient options (section "ServerFlags") in a multiseat system.
Section "Device"
        Identifier      "Card0"
        BoardName       "ATI Technologies Inc RV370 5B60 [Radeon X300 (PCIE)]"
        Driver          "ati"
        BusID           "PCI:1:0:0"
        Option          "Monitor-VGA-0" "Mon-VGA"
        Option          "Monitor-DVI-0" "Mon-DVI"
EndSection

Section "Monitor"
        Identifier      "Mon-VGA"
        Option          "DPMS"
EndSection

Section "Monitor"
        Identifier      "Mon-DVI"
        Option          "DPMS"
        Option          "Below"       "Mon-VGA"
EndSection

Section "Screen"
        Identifier      "Screen-base"
        Device          "Card0"
        Monitor         "Mon-VGA"
        DefaultDepth    24
        Subsection      "Display"
                Depth   24
                Modes   "1280x1024"
                Virtual 1280 2048
        EndSubSection
EndSection

Section "ServerFlags"
        # Even if mouse detection fails, X will start
        Option "AllowMouseOpenFail" "yes"

        # VT switching is disabled
        Option "DontVTSwitch" "yes"

        # X restart (Ctrl+Alt+Backspace) is disabled
        Option "DontZap" "yes"
EndSection
Notice that this time, we have defined a vertical setup of the monitors. This is just to test if 3D acceleration works with horizontal and vertical dimensions of the virtual screen lower (or equal) than 2048 pixels. If you feel more comfortable with an horizontal setup, just use leftOf or rightOf instead of below, and change the virtual size to the proper one according to the desired layout.
After having done this change, if we restart the X server we will see a vertical desktop with these characteristics:
$ xrandr -q
Screen 0: minimum 320 x 200, current 1280 x 2048, maximum 1280 x 2048
VGA-0 connected 1280x1024+0+0 (normal left inverted right x axis y axis) 338mm x 270mm
   1280x1024      60.0*+   75.0     60.0*
   1152x864       75.0
   1024x768       75.0     60.0
   832x624        74.6
   800x600        75.0     60.3
   640x480        75.0     59.9
   720x400        70.1
DVI-0 connected 1280x1024+0+1024 (normal left inverted right x axis y axis) 338mm x 270mm
   1280x1024      60.0*+   75.0     60.0*
   1152x864       75.0
   1024x768       75.0     70.1     60.0
   832x624        74.6
   800x600        72.2     75.0     60.3
   640x480        75.0     72.8     59.9
   720x400        70.1
S-video disconnected (normal left inverted right x axis y axis)
Once we have modified the xorg.conf file and having already obtained a big desktop covering the two monitors (either with an horizontal or with a vertical layout), the next thing is to configure gdm to launch two Xephyr sessions, one for every seat.
Previously, you will need to obtain the information related to the input events on your system.
$ ls -la /dev/input/by-path/ | grep event | grep kbd
lrwxrwxrwx 1 root root   9 2009-06-18 13:11 pci-0000:00:1d.2-usb-0:2:1.0-event-kbd -> ../event5
lrwxrwxrwx 1 root root   9 2009-06-18 13:11 platform-i8042-serio-0-event-kbd -> ../event3

$ ls -la /dev/input/by-path/ | grep event | grep mouse
lrwxrwxrwx 1 root root   9 2009-06-18 13:11 pci-0000:00:1d.2-usb-0:1:1.0-event-mouse -> ../event4
lrwxrwxrwx 1 root root   9 2009-06-18 13:11 platform-i8042-serio-1-event-mouse -> ../event8
In this case, we have a set of PS2 keyboard + mouse for one seat, and a pair of USB keyboard + mouse for the second one. The values that you are obtaining here will be used to configure the corresponding input device for every seat.
The next step is to create a launcher in order to execute Xephyr with the proper parameters and input events. To achieve that, we create a file that will be used as a launcher script. You can name the file and place it as you consider most appropriated. We have chosen to create it as /usr/sbin/Xephyr-path.sh
Use your favorite editor (vi, gedit, ...) to create it, and do not forget to make it executable by root (the file owner).
$ sudo gedit /usr/sbin/Xephyr-path.sh
$ sudo chmod 744 /usr/sbin/Xephyr-path.sh
You should create a file with something like these contents (change the xkblayout parameter according to your language):
$ cat /usr/sbin/Xephyr-path.sh
#!/bin/bash

# 200906 - josean
# http://netpatia.blogspot.com/

trap "" usr1

XEPHYR=/usr/bin/Xephyr
DISPLAY=:0
XAUTHORITY=/var/lib/gdm/:0.Xauth

args=()

while [ ! -z "$1" ]; do
 if [[ "$1" == "-kbdpath" ]]; then
   shift
   if [ ! -z "$1" ]; then
     args=("${args[@]}" "-keybd")
     args=("${args[@]}" "evdev,,device=/dev/input/by-path/$1,xkbrules=xorg,xkbmodel=evdev,xkblayout=es")
   fi
 elif [[ "$1" == "-mousepath" ]]; then
   shift
   if [ ! -z "$1" ]; then
     args=("${args[@]}" "-mouse")
     args=("${args[@]}" "evdev,,device=/dev/input/by-path/$1")
   fi
   else
     args=("${args[@]}" "$1")
#  echo "+++ args $1 +++" >> /tmp/logXephyr
 fi
 shift
done

# Next line is just to create a log file with the invocation parameters, for debug purposes
echo $XEPHYR "${args[@]}" >> /tmp/logXephyr
exec $XEPHYR "${args[@]}"
After the creation of this script, you can proceed with the modifications to the /etc/gdm/gdm.conf file.
On the [servers] section of gdm.conf, we comment out the rules corresponding to the original layout and define the new one. We modify the file to create the base X server and two Xephyr sessions (one for every seat) over the base X.
# ****************************************************************************

[servers]

# 0=Standard
#
# Means that DISPLAY ":0" will start an X server as defined in the
# [server-Standard] section.

# ****************************************************************************

# Multiseat setup (200906)

0=Xephyr0
1=Xephyr1
2=Xephyr2

[server-Xephyr0]
name=Xephyr0
command=/usr/bin/X -br -dpms -s 0
handled=false
flexible=false

[server-Xephyr1]
name=Xephyr1
command=/usr/sbin/Xephyr-path.sh -br -screen 1280x1024 -kbdpath platform-i8042-serio-0-event-kbd -mousepath platform-i8042-serio-1-event-mouse
handled=true
flexible=false

[server-Xephyr2]
name=Xephyr2
command=/usr/sbin/Xephyr-path.sh -br -screen 1280x1024 -kbdpath pci-0000:00:1d.2-usb-0:2:1.0-event-kbd -mousepath pci-0000:00:1d.2-usb-0:1:1.0-event-mouse
handled=true
flexible=false

# ****************************************************************************
Notice that this is the script where you will have to indicate what the input devices (their physical connections) are for every seat.
The second change to the gdm.conf file is related to the greeter. There are still things that need to be done manually.
We encounter the already known problem of having every Xephyr window properly placed (one Xephyr session appearing on every display). The current Xephyr version does not support the geometry parameter that most X applications include, so it is not possible to place the Xephyr window in the desired place. In order to circumvent this problem, we create a script that will be called instead of doing a direct call to the session greeter. Such script invokes some command line tools in order to place every Xephyr window just in the place where we want to have it. We will use the following command line tools: xwininfo, wmctrl to move one of the Xephyr sessions to the second monitor, so that they do not overlap anymore. That is the reason why we installed the wmctrl package.
In the [daemon] section of gdm.conf change the reference to the original greeter for a reference to a new script. This script, apart for invoking the greeter, will place properly every Xephyr window:
# ****************************************************************************

[daemon]

# The greeter for attached (non-xdmcp) logins.  Change gdmlogin to gdmgreeter
# to get the new graphical greeter.
# Greeter=/usr/lib/gdm/gdmgreeter
Greeter=/usr/sbin/Xephyr-login.sh

# ****************************************************************************
We will have to create the script responsible of the greeter/login (in our case, /usr/sbin/Xephyr-login.sh). This script will be executed by the gdm user, so we create a file owned by gdm and give execution permission just for that user.
$ sudo gedit /usr/sbin/Xephyr-login.sh
$ sudo chown gdm:gdm /usr/sbin/Xephyr-login.sh
$ sudo chmod 744 /usr/sbin/Xephyr-login.sh
After the creation of such script, it should look like this:
$ cat /usr/sbin/Xephyr-login.sh
#!/bin/bash
# /usr/sbin/Xephyr-login.sh

XAUTH_BASE=/var/lib/gdm/:0.Xauth
DISPL_BASE=:0

XEP=$(XAUTHORITY=$XAUTH_BASE xwininfo -root -children -display :0 | grep "Xephyr on :1" --max-count=1)
echo ${XEP} >> /tmp/logXephyrLogin

# assign values to positional parameters to obtain the id (first parameter) of the Xephyr window
set ${XEP}
DISPLAY=$DISPL_BASE XAUTHORITY=$XAUTH_BASE wmctrl -i -r $1 -e 0,0,1024,-1,-1
# echo $1 >> /tmp/logXephyrLogin_1

/usr/lib/gdm/gdmlogin
In our case, we move one of the sessions 1024 pixels vertically (remember that our layout consists of two 1280x1024 displays vertically aligned).
As you can see, when the greeter is expected to be invoked, the wrapper script (including greeter invocation) is executed instead. The user(s) finally sees every greeter in a different display and the rest of the process is almost unnoticeable.
The last comment is about the greeter. The old style gdmlogin was some time ago replaced by a more modern gdmgreeter. There is something wrong about screen size detection with this default gdm greeter (gdmgreeter). It always try to start at a resolution of 1600x1200, so we had to change to the old greeter (gdmlogin) which detects properly the screen resolutions of the Xephyr sessions.
Maybe gdmgreeter uses xrandr to detect the resolution of every Xephyr session, since 1600x1200 is the max output reported by xrandr on every Xephyr session. The Xephyr windows are in fact resizable by means of xrandr, so we are not sure if this is a bug of xrandr that sould only report the current size, or a bug of gdmgreeter assuming that it must change the window size to the biggest available.
$ DISPLAY=:1 xrandr -q
Screen 0: minimum 160 x 160, current 1280 x 1024, maximum 1600 x 1200
default connected 1280x1024+0+0 (normal left inverted right x axis y axis) 0mm x 0mm
   1600x1200       0.0
   1400x1050       0.0
   1280x960        0.0
   1280x1024       0.0*
   1152x864        0.0
   1024x768        0.0
   832x624         0.0
   800x600         0.0
   720x400         0.0
   480x640         0.0
   640x480         0.0
   640x400         0.0
   320x240         0.0
   240x320         0.0
   160x160         0.0
In order to avoid this problem, we use gdmlogin instead of gdmgreeter.
The Ubuntu 9.04 version of the multiseat setup, achieves some improvements over previous versions:
* Mouse wheel works properly.
* Keyboard led indicators are not messed up.
Updated 2009/06/22: Some minor changes
Updated 2009/07/16: Some changes in Xephyr-path.sh and Xephyr-login.sh
Access control is now enabled in both Xephyr sessions. The previous configuration had access control disabled (-ac option).
Monday, March 24, 2008
Multiseat in Ubuntu 8.04 (III)
<< step (II) <<
After the previous modifications, our system is almost ready to use. Unfortunately there are still some pending details to be resolved.
The first problem is to achieve having every Xephyr screen properly placed (one display for every Xephyr). The current Xephyr version does not support the geometry parameter that most X applications include, so it is not possible to place the Xephyr window in the desired place (i.e. one Xephyr on every display).
To workaround this problem we can use some command line tools in order to place every Xephyr window just in the place where we want to have it. We will need the following packages: xwininfo, wmctrl. Install them with your favorite tool (synaptic, apt-get).
The next step is to modify the gdm.conf file in order to invoke a wrapping script when calling the gdm greeter.
In our example, we have the following script wrapper placed in /usr/sbin just as we did with the Xephyr wrapper (be sure to give the script execution permissions):
In our particular case, we have tho displays at 1280x1024. Having the display resolutions hardcoded in such a script is very awful, so consider it just as a dirty and quick workaround to have things working. Experienced bash script coders with nicer solutions are welcome :-)
As we said before, you have to modify the /etc/gdm/gdm.conf file (the gdm greeter call) in order to call this script. The script will move one of the Xephyr sessions to the right display while maintaining the other on the left display.
As you can see, when the greeter is expected to be invoked, the wrapper script (including greeter invocation) is executed instead.
The last comment is about the greeter. There is something wrong about screen size detection with the default gdm greeter (gdmgreeter). It always try to start at a resolution of 1600x1200, so we had to change to the old greeter (gdmlogin) which detects properly the screen resolutions of the Xephyr sessions.
After the previous modifications, our system is almost ready to use. Unfortunately there are still some pending details to be resolved.
The first problem is to achieve having every Xephyr screen properly placed (one display for every Xephyr). The current Xephyr version does not support the geometry parameter that most X applications include, so it is not possible to place the Xephyr window in the desired place (i.e. one Xephyr on every display).
To workaround this problem we can use some command line tools in order to place every Xephyr window just in the place where we want to have it. We will need the following packages: xwininfo, wmctrl. Install them with your favorite tool (synaptic, apt-get).
The next step is to modify the gdm.conf file in order to invoke a wrapping script when calling the gdm greeter.
In our example, we have the following script wrapper placed in /usr/sbin just as we did with the Xephyr wrapper (be sure to give the script execution permissions):
#!/bin/bash
# /usr/sbin/Xephyr-login.sh

XAUTHORITY=/var/lib/gdm/:0.Xauth
XEP=$(xwininfo -root -children -display :0 | grep "Xephyr on :1" --max-count=1)
echo XEP ${XEP} >> /tmp/logXephyr
set -- ${XEP}
XAUTHORITY=/var/lib/gdm/:0.Xauth
DISPLAY=:0 wmctrl -i -r $1 -e 0,1280,0,-1,-1
/usr/lib/gdm/gdmlogin
# /usr/lib/gdm/gdmgreeter
In our particular case, we have tho displays at 1280x1024. Having the display resolutions hardcoded in such a script is very awful, so consider it just as a dirty and quick workaround to have things working. Experienced bash script coders with nicer solutions are welcome :-)
As we said before, you have to modify the /etc/gdm/gdm.conf file (the gdm greeter call) in order to call this script. The script will move one of the Xephyr sessions to the right display while maintaining the other on the left display.
# The greeter for attached (non-xdmcp) logins.  Change gdmlogin to gdmgreeter
# to get the new graphical greeter.
# Greeter=/usr/lib/gdm/gdmgreeter
Greeter=/usr/sbin/Xephyr-login.sh
As you can see, when the greeter is expected to be invoked, the wrapper script (including greeter invocation) is executed instead.
The last comment is about the greeter. There is something wrong about screen size detection with the default gdm greeter (gdmgreeter). It always try to start at a resolution of 1600x1200, so we had to change to the old greeter (gdmlogin) which detects properly the screen resolutions of the Xephyr sessions.
Thursday, February 21, 2008
Multiseat in Ubuntu 8.04 (II)
<< step (I) <<
Once we have modified the xorg.conf file and we have a big desktop in the two monitors, the next thing is to configure gdm to launch the two Xephyr sessions.
Previously, you will need to obtain the information related to the input events on your system. The way of referencing the events has been recently modified. Now, the operating system allows you to access the events via their paths, and on some systems, via their names. The script wrapper to launch Xephyr it is now simpler compared to the previous version. It is not necessary any more to match the events with the physical locations (as we did through /proc/bus/input/devices)
You must obtain the path-based symbolic links to the events corresponding to your keyboards and mouses. In our particular case, whe have two USB keyboards, one USB mouse and one PS/2 mouse.
The invocation of the Xephyr wrapper in the (/etc/gdm/gdm.conf) file will be something like this (remember to do a backup of your files before doing any modification!):
Notice that the Xepyr wrapper is called Xephyr-path.sh (just to remark the modification). If you prefer to reference the devices by its name instead of the path, obtain the names in a similar way (have a look at /dev/input/by-name/) and do the necessary modifications on the wrapper.
Since the previous version, xserver-xephyr has been modified so the script is slightly different from the old one. Place the script somewhere in your computer (and remember to give it execution permissions) so it can be invoked when gdm starts. In our prototype, the wrapper is placed at /usr/sbin/Xephyr-path.sh
Notice the changes, mainly in the options passed to the evdev driver for mouse and keyboard.
Another significant change on the wrapper script is the removal of the line...
...from the 6.06 version. Now, the parameters related to virtual terminals are not filtered, so they are passed in the final invocation. In our prototype, the two seats share the same vt (vt9) and this seems to be no problem at all. If you have more seats or you experience some problem, maybe you will need to filter the vt parameters in the final Xephyr call.
Currently, the mouse wheel (vertical scroll) is not working. The option WHEELRelativeAxisButtons is just to try to get it working, but without success at the moment. Unfortunately there is not much documentation about evdev and its options. If somebody achieves to manage the mouse wheel, feedback is welcome.
The good news is that the keyboard mapping seems to work properly. After dozens of trials with parameters (keyboard layouts, mapping, geometry), an updated package of xserver-xephyr was published some days ago. The new package corrected a bug in the path locations where evdev was looking for keyboard definition files. Now everything works perfect, you just have to choose the language layout for your keyboard (Spanish in our example).
If you test the system at this stage, you will probably see just only one login window. There is still a couple of things to do before your system is ready to use.
>> step (III) >>
Once we have modified the xorg.conf file and we have a big desktop in the two monitors, the next thing is to configure gdm to launch the two Xephyr sessions.
Previously, you will need to obtain the information related to the input events on your system. The way of referencing the events has been recently modified. Now, the operating system allows you to access the events via their paths, and on some systems, via their names. The script wrapper to launch Xephyr it is now simpler compared to the previous version. It is not necessary any more to match the events with the physical locations (as we did through /proc/bus/input/devices)
You must obtain the path-based symbolic links to the events corresponding to your keyboards and mouses. In our particular case, whe have two USB keyboards, one USB mouse and one PS/2 mouse.
# ls -la /dev/input/by-path/ | grep event | grep kbd
lrwxrwxrwx 1 root root   9 2008-02-20 09:49 pci-0000:00:1d.2-usb-0:1:1.0-event-kbd -> ../event5
lrwxrwxrwx 1 root root   9 2008-02-20 09:49 pci-0000:00:1d.2-usb-0:2:1.0-event-kbd -> ../event6

# ls -la /dev/input/by-path/ | grep event | grep mouse
lrwxrwxrwx 1 root root   9 2008-02-20 09:49 pci-0000:00:1d.3-usb-0:1:1.0-event-mouse -> ../event8
lrwxrwxrwx 1 root root   9 2008-02-20 09:49 platform-i8042-serio-1-event-mouse -> ../event2
The invocation of the Xephyr wrapper in the (/etc/gdm/gdm.conf) file will be something like this (remember to do a backup of your files before doing any modification!):
# ****************************************************************************

# Modificaciones multiseat (20080109)

0=Xephyr0
1=Xephyr1
2=Xephyr2

[server-Xephyr0]
name=Xephyr0
command=/usr/bin/X -br -dpms -s 0
handled=false
flexible=false

[server-Xephyr1]
name=Xephyr1
command=/usr/sbin/Xephyr-path.sh -display :0 -br -xauthority /var/lib/gdm/:0.Xauth -screen 1280x1024 -kbdpath pci-0000:00:1d.2-usb-0:2:1.0-event-kbd -mousepath platform-i8042-serio-1-event-mouse
handled=true
flexible=false

[server-Xephyr2]
name=Xephyr2
command=/usr/sbin/Xephyr-path.sh -display :0 -br -xauthority /var/lib/gdm/:0.Xauth -screen 1280x1024+1280+0 -kbdpath pci-0000:00:1d.2-usb-0:1:1.0-event-kbd -mousepath pci-0000:00:1d.3-usb-0:1:1.0-event-mouse
handled=true
flexible=false

# ****************************************************************************
Notice that the Xepyr wrapper is called Xephyr-path.sh (just to remark the modification). If you prefer to reference the devices by its name instead of the path, obtain the names in a similar way (have a look at /dev/input/by-name/) and do the necessary modifications on the wrapper.
Since the previous version, xserver-xephyr has been modified so the script is slightly different from the old one. Place the script somewhere in your computer (and remember to give it execution permissions) so it can be invoked when gdm starts. In our prototype, the wrapper is placed at /usr/sbin/Xephyr-path.sh
#!/bin/bash

# 20080109..20080221 - josean
# http://netpatia.blogspot.com/

trap "" usr1

XEPHYR=/usr/bin/Xephyr

args=()

while [ ! -z "$1" ]; do
 if [[ "$1" == "-xauthority" ]]; then
   shift
   if [ ! -z "$1" ]; then
     export XAUTHORITY="$1"
   fi
 elif [[ "$1" == "-display" ]]; then
   shift
   if [ ! -z "$1" ]; then
     export DISPLAY="$1"
   fi
 elif [[ "$1" == "-kbdpath" ]]; then
   shift
   if [ ! -z "$1" ]; then
     args=("${args[@]}" "-keybd")
     args=("${args[@]}" "evdev,,device=/dev/input/by-path/$1,xkbrules=xorg,xkbmodel=evdev,xkblayout=es")
   fi
 elif [[ "$1" == "-mousepath" ]]; then
   shift
   if [ ! -z "$1" ]; then
     args=("${args[@]}" "-mouse")
     args=("${args[@]}" "evdev,,device=/dev/input/by-path/$1,WHEELRelativeAxisButtons 6 7")
   fi
   else
     args=("${args[@]}" "$1")
   echo "+++ args $1 +++" >> /tmp/logXephyr
 fi
 shift
done

echo $XEPHYR -ac "${args[@]}" >> /tmp/logXephyr
exec $XEPHYR -ac "${args[@]}"
Notice the changes, mainly in the options passed to the evdev driver for mouse and keyboard.
Another significant change on the wrapper script is the removal of the line...
elif ! expr match $1 'vt[0-9][0-9]*' >/dev/null; then
...from the 6.06 version. Now, the parameters related to virtual terminals are not filtered, so they are passed in the final invocation. In our prototype, the two seats share the same vt (vt9) and this seems to be no problem at all. If you have more seats or you experience some problem, maybe you will need to filter the vt parameters in the final Xephyr call.
Currently, the mouse wheel (vertical scroll) is not working. The option WHEELRelativeAxisButtons is just to try to get it working, but without success at the moment. Unfortunately there is not much documentation about evdev and its options. If somebody achieves to manage the mouse wheel, feedback is welcome.
The good news is that the keyboard mapping seems to work properly. After dozens of trials with parameters (keyboard layouts, mapping, geometry), an updated package of xserver-xephyr was published some days ago. The new package corrected a bug in the path locations where evdev was looking for keyboard definition files. Now everything works perfect, you just have to choose the language layout for your keyboard (Spanish in our example).
If you test the system at this stage, you will probably see just only one login window. There is still a couple of things to do before your system is ready to use.
>> step (III) >>
Tuesday, February 19, 2008
Multiseat computer with Ubuntu 8.04
The goal of this guide is to achieve a multiseat (also called multiterminal) computer so that more than one user can work simultaneously with the computer.
Update (20090619): New tutorial for Multiseat in Ubuntu 9.04 available
In our particular case, we want to obtain a computer for two users, and as a constraint we want to use only one video card. Obviously the card will be a multihead one.
Our hardware can be considered as a low cost PC: The computer is equiped with a Pentium 4 at 3GHz, 512MB of RAM and a 80GB hard sisk. The video card is a Radeon X300 PCIe by ATI with two outputs (VGA and DVI). On the DVI output we have a DVI to VGA converter so we can connect two simple VGA monitors.
What to do step by step:
1.- Install the latest available version of Ubuntu 8.04 on your hard disk. We started the first prototype with the alfa 2 version and several of the problems that we encountered have been already fixed.
2.- After the installation do a package update to be sure that your system has the latest available packages.
One of the main changes in the multihead configuration is the use of xrandr. First of all you must plug the two monitors to your graphic card and obtain your configuration details. Read carefully the instructions of xrandr. The video out connections (VGA, DVI) are referenced with different names depending on your card manufacturer.
Once you have this information, you can modify your /etc/X11/xorg.conf file. It is very advisable to make a backup of the original (working) configuration file.
This is the xorg.conf for the prototype here presented:
The lines ...
... are to indicate which monitor is connected to each of the card video outputs.
You can eliminate some lines, such as those related to acceleration (dri, glx). As we will use Xephyr, the final result will not have 3D acceleration. In our case, that does not matter because the PC will be used on an office environment, mainly for administrative tasks.
The line ...
... on the screen section is like a kind of bounding box containing the two monitor. As you can see, we have two 1280x1024 monitors in a side by side configuration.
If you restart the X system, you will have a big desktop across the two monitors.
Update (20080508): Comment out the "/dev/null" option in the mouse section. In the final configuration you will not need the base mouse anymore, but this line in this moment will let your desktop without mouse support.
>> step II >>
Update (20090619): New tutorial for Multiseat in Ubuntu 9.04 available
In our particular case, we want to obtain a computer for two users, and as a constraint we want to use only one video card. Obviously the card will be a multihead one.
Our hardware can be considered as a low cost PC: The computer is equiped with a Pentium 4 at 3GHz, 512MB of RAM and a 80GB hard sisk. The video card is a Radeon X300 PCIe by ATI with two outputs (VGA and DVI). On the DVI output we have a DVI to VGA converter so we can connect two simple VGA monitors.
What to do step by step:
1.- Install the latest available version of Ubuntu 8.04 on your hard disk. We started the first prototype with the alfa 2 version and several of the problems that we encountered have been already fixed.
2.- After the installation do a package update to be sure that your system has the latest available packages.
One of the main changes in the multihead configuration is the use of xrandr. First of all you must plug the two monitors to your graphic card and obtain your configuration details. Read carefully the instructions of xrandr. The video out connections (VGA, DVI) are referenced with different names depending on your card manufacturer.
# xrandr -q
Screen 0: minimum 320 x 200, current 2560 x 1024, maximum 2560 x 1024
VGA-0 connected 1280x1024+0+0 (normal left inverted right x axis y axis) 337mm x 270mm
   1280x1024      60.0*+   75.0     59.9
   1152x864       75.0
   1024x768       75.1     70.1     60.0
   832x624        74.6
   800x600        72.2     75.0     60.3
   640x480        75.0     72.8     60.0
   720x400        70.1
DVI-0 connected 1280x1024+1280+0 (normal left inverted right x axis y axis) 337mm x 270mm
   1280x1024      60.0*+   75.0     59.9
   1152x864       75.0
   1024x768       75.1     70.1     60.0
   832x624        74.6
   800x600        72.2     75.0     60.3
   640x480        75.0     72.8     60.0
   720x400        70.1
S-video disconnected (normal left inverted right x axis y axis)
Once you have this information, you can modify your /etc/X11/xorg.conf file. It is very advisable to make a backup of the original (working) configuration file.
This is the xorg.conf for the prototype here presented:
# xorg.conf (X.Org X Window System server configuration file)

Section "Module"
        Load    "dri"
        Load    "drm"
        Load    "glx"
EndSection

Section "DRI"
        Mode    0666
EndSection

Section "Extensions"
        Option  "Composite" "Enable"
EndSection

Section "InputDevice"
        Identifier      "Keyboard-base"
        Driver          "kbd"
#       Option          "Device"        "/dev/null"
        Option          "XkbRules"      "xorg"
        Option          "XkbModel"      "evdev"
        Option          "XkbLayout"     "es"
EndSection

Section "InputDevice"
        Identifier      "Mouse-base"
        Driver          "mouse"
        Option          "Device"        "/dev/null"
EndSection

Section "Device"
        Identifier      "Card0"
        BoardName       "ATI Technologies Inc RV370 5B60 [Radeon X300 (PCIE)]"
        Driver          "ati"
        BusID           "PCI:1:0:0"
        Option          "Monitor-VGA-0" "Mon-VGA"
        Option          "Monitor-DVI-0" "Mon-DVI"
EndSection

Section "Monitor"
        Identifier      "Mon-VGA"
        Option          "DPMS"
EndSection

Section "Monitor"
        Identifier      "Mon-DVI"
        Option          "DPMS"
        Option          "RightOf"       "Mon-VGA"
EndSection

Section "Screen"
        Identifier      "Screen-base"
        Device          "Card0"
        Monitor         "Mon-VGA"
        DefaultDepth    24
        Subsection      "Display"
                Depth   24
                Modes   "1280x1024" "1024x768"
                Virtual 2560 1024
        EndSubSection
EndSection

Section "ServerFlags"
        # Even if mouse detection fails, X will start
        Option "AllowMouseOpenFail" "yes"

        # VT switching is disabled
        Option "DontVTSwitch" "yes"

        # X restart (Ctrl+Alt+Backspace) is disabled
        Option "DontZap" "yes"
EndSection
The lines ...
        Option          "Monitor-VGA-0" "Mon-VGA"
        Option          "Monitor-DVI-0" "Mon-DVI"
... are to indicate which monitor is connected to each of the card video outputs.
You can eliminate some lines, such as those related to acceleration (dri, glx). As we will use Xephyr, the final result will not have 3D acceleration. In our case, that does not matter because the PC will be used on an office environment, mainly for administrative tasks.
The line ...
Virtual 2560 1024
... on the screen section is like a kind of bounding box containing the two monitor. As you can see, we have two 1280x1024 monitors in a side by side configuration.
If you restart the X system, you will have a big desktop across the two monitors.
Update (20080508): Comment out the "/dev/null" option in the mouse section. In the final configuration you will not need the base mouse anymore, but this line in this moment will let your desktop without mouse support.
Section "InputDevice"
        Identifier      "Mouse-base"
        Driver          "mouse"
->        Option          "Device"        "/dev/null"
EndSection
>> step II >>
Wednesday, February 13, 2008
Video of Ubuntu 8.04 multiseat computer
At last, the prototye of the Ubuntu 8.04 multiseat computer is already running.
We started working on that prototype with the alfa 2 version, and currently it runs under the alfa 4 one. During this time many bugs have been fixed and what seemed impossible to achieve one month ago, is a working computer right now.
In this moment, we have a computer usable and apparently stable. Two people can use (share) simultaneously the computer, and this one uses only one graphic card (the same as we did in our first trial).
There are still some minor bugs and limitations, but we hope that things will keep improving in the two remaining months until the publication of the final release.
We started working on that prototype with the alfa 2 version, and currently it runs under the alfa 4 one. During this time many bugs have been fixed and what seemed impossible to achieve one month ago, is a working computer right now.
In this moment, we have a computer usable and apparently stable. Two people can use (share) simultaneously the computer, and this one uses only one graphic card (the same as we did in our first trial).
There are still some minor bugs and limitations, but we hope that things will keep improving in the two remaining months until the publication of the final release.
Monday, January 28, 2008
Coming soon: Multiseat in Ubuntu 8.04
In three months the guys of canonical are releasing the next Ubuntu version. As they did with the 6.06, the 8.04 is a LTS (Long Term Support) version. That ensures three years of support (updates, security fixes, etc), so these versions are ideal for sites intended to be working for a very long period of time with a minimal maintenance (i.e. no intentions to do major version upgrades but only keeping up to date the original version).

There are several changes that affect to the current multiseat configuration. The goal is just the same as it was in our fist multiseat configuration (using Ubuntu 6.06): To obtain two seats using just one graphic card with two video outputs.
The Ubuntu 8.04 release includes xorg 7.3 with some important changes compared to previous versions. The main advantage of that version is that the xserver-xephyr package includes support for evdev input events. We finally can obtain a full multiseat computer just doing some modifications in configuration files, and with no need of external patches. That eases the setup of the system as well as it avoids problems in the process of package updating.
Another relevant change is the use of xrandr instead of xinerama to manage the multiple outputs of a video card. At the begining that was a problem until we found a way to obtain the same as we did on the previous version: Showing a xephyr session on every screen.
We have been doing several tests with Ubuntu 8.04 alfa 2 and alfa 3. The result is a working prototype but we are still having some issues to fix. The fact of working with alfa and prerelease versions means to deal with additional problems, but we are confident in obtaining an easy to follow step by step tutorial to create a two seat computer when the final 8.04 version will be released.

There are several changes that affect to the current multiseat configuration. The goal is just the same as it was in our fist multiseat configuration (using Ubuntu 6.06): To obtain two seats using just one graphic card with two video outputs.
The Ubuntu 8.04 release includes xorg 7.3 with some important changes compared to previous versions. The main advantage of that version is that the xserver-xephyr package includes support for evdev input events. We finally can obtain a full multiseat computer just doing some modifications in configuration files, and with no need of external patches. That eases the setup of the system as well as it avoids problems in the process of package updating.
Another relevant change is the use of xrandr instead of xinerama to manage the multiple outputs of a video card. At the begining that was a problem until we found a way to obtain the same as we did on the previous version: Showing a xephyr session on every screen.
We have been doing several tests with Ubuntu 8.04 alfa 2 and alfa 3. The result is a working prototype but we are still having some issues to fix. The fact of working with alfa and prerelease versions means to deal with additional problems, but we are confident in obtaining an easy to follow step by step tutorial to create a two seat computer when the final 8.04 version will be released.
Saturday, May 05, 2007
Multiseat in Ubuntu 7.04
The multiseat computer configuration has been carried out again on a new computer with the Ubuntu 7.04 release.

The main difference in this installation is that a brand new computer has been used. The computer was equiped with a PCI-Express card (nVidia 6600), instead of using an AGP card as we did in our first installation.

The big news are that the problems related to keyboard configuration seem to be solved. The page related to gdm and xkb has been updated with instructions on how to solve the keyboard missconfiguration problem reported by several users.

Update (20080114): Pics added. The pics were taken on 20070518

The main difference in this installation is that a brand new computer has been used. The computer was equiped with a PCI-Express card (nVidia 6600), instead of using an AGP card as we did in our first installation.

The big news are that the problems related to keyboard configuration seem to be solved. The page related to gdm and xkb has been updated with instructions on how to solve the keyboard missconfiguration problem reported by several users.

Update (20080114): Pics added. The pics were taken on 20070518
Friday, October 20, 2006
Multiseat in Mandriva 2007
I was on the web, looking for information on Xephyr, when I accidentally discovered an interesting feature. The Mandriva 2007 Linux distribution includes in the standard repositories a version of Xephyr with evdev support.
In the changelog, you can find that the 'evdev' patch has been included:
So, I now have an additional TO DO in my pending tasks: Test if a multiterminal configuration can be obtained using a standard distribution without additional external packages or patches. Maybe Mandriva 2007 will be the first affirmative answer.
In the changelog, you can find that the 'evdev' patch has been included:
* Tue Jul 04 2006 Gustavo Pichorim Boiko <..mail@removed..>
  + 2006-07-03 11:05:06 (38323)
  - Removed the FIXME lines. All fixed.
  - Added a patch providing evdev support for the Xephyr kdrive server. It is used
    for multihead/multiseat solutions
So, I now have an additional TO DO in my pending tasks: Test if a multiterminal configuration can be obtained using a standard distribution without additional external packages or patches. Maybe Mandriva 2007 will be the first affirmative answer.
Saturday, September 09, 2006
Multiseat (VI): Final notes
(...comes from step V)
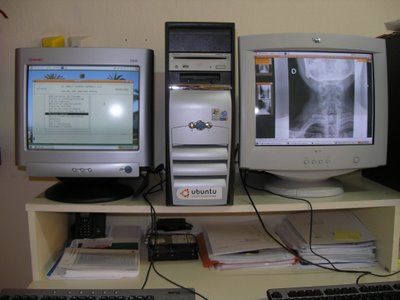
This project is just an evaluation prototype. It has been developed in a Hospital environment to determine if the computer on every medical examination room can be used simultaneously by two people.
Currently there is a computer on every examination room. Through the computer, some administrative tasks related to the patient are carried on by a nurse. There is also a web based information system, used by the physician to access to the medical information of every patient.
The goal is to share the same computer for administrative and medical tasks simultaneously (that is why only two seats are necessary in our case study) and evaluate the opinions of the final users about the new system.
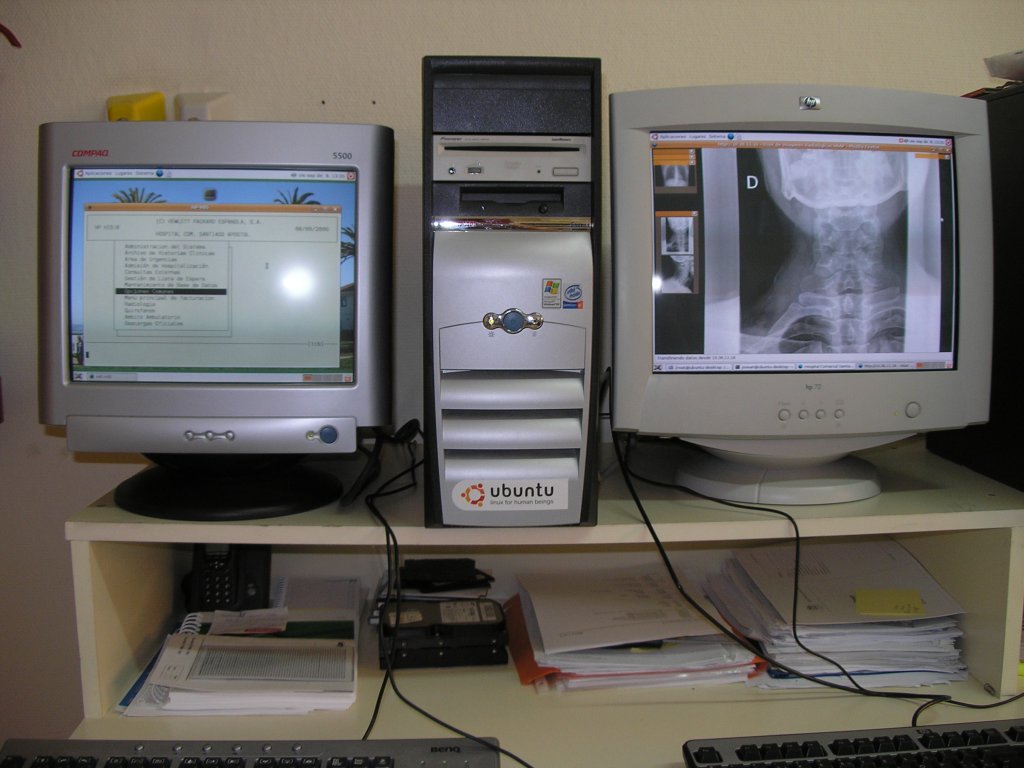
This project is just an evaluation prototype. It has been developed in a Hospital environment to determine if the computer on every medical examination room can be used simultaneously by two people.
Currently there is a computer on every examination room. Through the computer, some administrative tasks related to the patient are carried on by a nurse. There is also a web based information system, used by the physician to access to the medical information of every patient.
The goal is to share the same computer for administrative and medical tasks simultaneously (that is why only two seats are necessary in our case study) and evaluate the opinions of the final users about the new system.
Friday, September 08, 2006
Multiseat (V): gdm and xkb
(...comes from step IV)
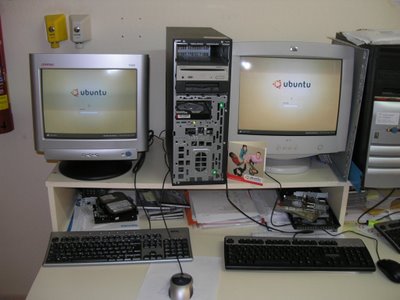
The next step is to configure gdm to indicate how to execute Xephyr.sh (the wrapper script). The call includes a couple of parameters (display and xauthority) that will be converted to environment variables . The other pair of parameters are the physical addresses of the input devices, that will be converted to the event numbers to be used as keyboard and mouse events.
Only the servers section of the gdm.conf file is shown
Notice theat the command lines have been split for better readability.
Right now, you already have a multiseat computer. If you start the graphic mode, you will see the two monitors showing the gdm login screen.
In this moment there is only one problem remaining: To be able to obtain a proper configuration of the keyboards.
According to messages in several forums on Internet, evdev seems to have some problems still waiting to be patched related to keyboard configuration. Some options are ignored, some others can lead to a fully missconfigured keyboard (no one key mapping to the correct one). After many hours looking for information, and dozens of trial-error tests with setxkbmap, we finally achieved to obtain a correct keyboard configuration.
The best solution is to create a keyboard configuration file for every Xephyr session (change the layout according to your particular locale):
Do never include this line rules = "evdev" in the Xn-config.keyboard file. Every test we did (and we did really lots of tests!) having such line present, the result was a useless keyboard with no correct keys at all!
Update (4-May-2007): Since we are using a Xephyr compiled on another distribution, there seem to be an issue with the directories, and some configuration files can not be found. Including these additional lines, you can avoid all the keyboard related problems:
Launch again the gdm, and have a coffee break. Your new toy is ready to play with!
(continues on step VI...)
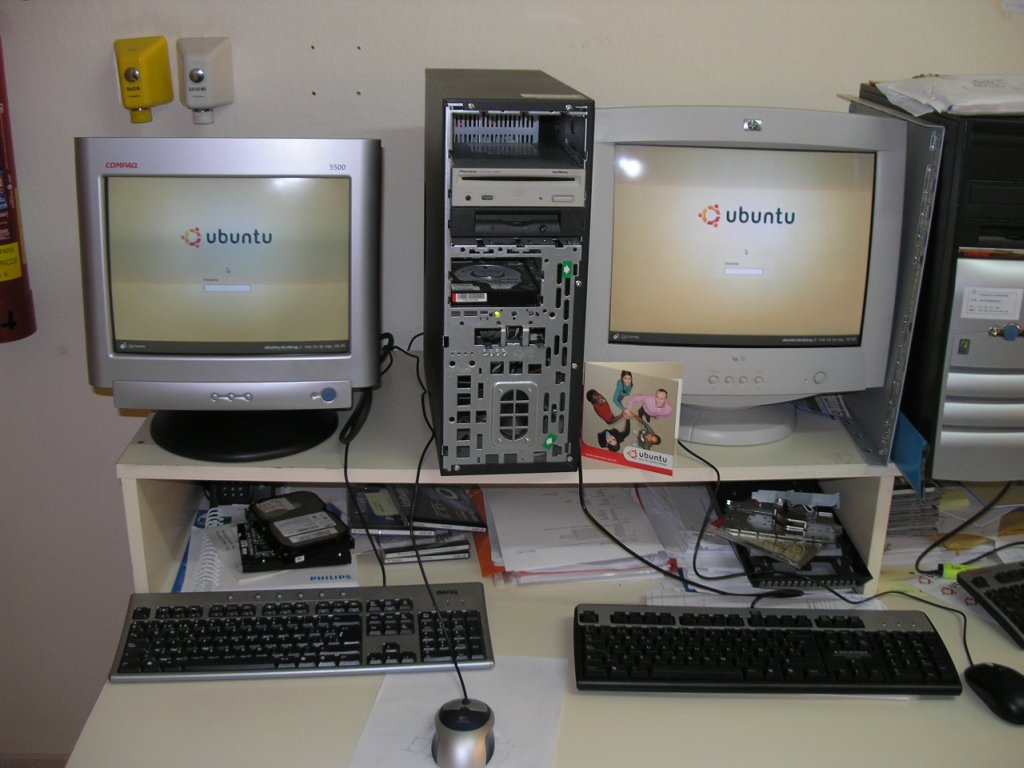
The next step is to configure gdm to indicate how to execute Xephyr.sh (the wrapper script). The call includes a couple of parameters (display and xauthority) that will be converted to environment variables . The other pair of parameters are the physical addresses of the input devices, that will be converted to the event numbers to be used as keyboard and mouse events.
# cp /etc/gdm/gdm.conf /etc/gdm/gdm.conf.bak
# vi /etc/gdm/gdm.conf
Only the servers section of the gdm.conf file is shown
[servers]

0=Xephyr0
1=Xephyr1
2=Xephyr2

[server-Xephyr0]
name=Xephyr0
command=/usr/bin/X -ac -br
handled=false
flexible=false

[server-Xephyr1]
name=Xephyr1
command=/usr/sbin/Xephyr.sh -display :0.0 -xauthority /var/lib/gdm/:0.Xauth -fullscreen -kbdphys isa0060/serio0/input0 -mousephys isa0060/serio1/input0 -use-evdev
handled=true
flexible=false

[server-Xephyr2]
name=Xephyr2
command=/usr/sbin/Xephyr.sh -display :0.1 -xauthority /var/lib/gdm/:0.Xauth -fullscreen -kbdphys usb-0000:00:1d.1-1/input0 -mousephys usb-0000:00:1d.1-2/input0 -use-evdev
handled=true
flexible=false
Notice theat the command lines have been split for better readability.
Right now, you already have a multiseat computer. If you start the graphic mode, you will see the two monitors showing the gdm login screen.
# /etc/init.d/gdm start
In this moment there is only one problem remaining: To be able to obtain a proper configuration of the keyboards.
According to messages in several forums on Internet, evdev seems to have some problems still waiting to be patched related to keyboard configuration. Some options are ignored, some others can lead to a fully missconfigured keyboard (no one key mapping to the correct one). After many hours looking for information, and dozens of trial-error tests with setxkbmap, we finally achieved to obtain a correct keyboard configuration.
The best solution is to create a keyboard configuration file for every Xephyr session (change the layout according to your particular locale):
# vi /etc/X11/xkb/X1-config.keyboard
model = "pc105"
keycodes = "evdev"
layout = "es"
# cp /etc/X11/xkb/X1-config.keyboard /etc/X11/xkb/X2-config.keyboard
Do never include this line rules = "evdev" in the Xn-config.keyboard file. Every test we did (and we did really lots of tests!) having such line present, the result was a useless keyboard with no correct keys at all!
Update (4-May-2007): Since we are using a Xephyr compiled on another distribution, there seem to be an issue with the directories, and some configuration files can not be found. Including these additional lines, you can avoid all the keyboard related problems:
# ln -s /usr/share/X11/xkb /usr/lib/X11/xkb
# cp /etc/X11/xkb/X*.keyboard /usr/lib/X11/xkb
# cp `which xkbcomp` /usr/lib/X11/xkb
# mkdir /usr/lib/X11/xkb/compiled
Launch again the gdm, and have a coffee break. Your new toy is ready to play with!
(continues on step VI...)
Multiseat (IV): evdev and Xephyr
(...comes from step III)
What is evdev?
evdev is the generic input event device driver. It passes the events generated in the kernel (since version 2.6.8) straight to the program, with timestamps.
The evdev driver is able to separate and distinguish events coming from different keyboards and mouses plugged into the computer. The xorg supports evdev input driver module since version 6.9/7.0 . This way, it can get separated input events coming from every seat (keyboard and mouse pair) on the system.
This is a great step compared to previous multiseat solutions, since it makes possible to have multiterminal systems without having to patch neither the kernel nor the X server.
What is Xephyr?
Xephyr is a kdrive based X Server which targets a window on a host X Server as its framebuffer. In other words, it is a piece of software which creates a X server on top of another X server. That will allow us to run as many Xephyr instances as seats we have in our system. Every Xephyr instance will cover the area shown in a given display, and finally, evdev will allow us to separate the different input devices.
The good news
Xephyr is included in the universe repository from Ubuntu.
The bad news
The Xephyr version included in the Ubuntu repository, does not support evdev. I hope in a near future Xephyr comes with evdev upport.
Right now, you will have either to patch the Xephyr sources and compile it, or download an already patched solution. Download links for both solutions are available here.
Now it is time to plug your second set of keyboard and mouse. The evdev driver will access the input coming from every device by means of a given event in the form of /dev/input/eventNN. You must obtain the event id associated to every input device.
A new problem arises, since the event number assigned can change (in fact, it changes) between different boots. To solve this problem we well use a wrapper script. The script is the same as proposed here, but modified in order to obtain the event number given the physical connection of the device. We are assuming that the devices will be always plugged in the same position (you can label the back connectors to remember the correct position). Since the physical device addresses do not change between boots, the script can obtain the corresponding event id and match it properly with one physical keyboard or mouse.
Input devices and events, once plugged the second keyboard and mouse:
The Name section will help us to identify the device. The Phys section is the parameter that we will send to the wrapper script in order to start every Xephyr instance.
The Xephyr wrapper
Now, it is time to create the wrapper script. The original one is modified to obtain the event numbers from the physical addresses
This is the final wrapper script:
Finally, be sure to allow the script to be executed.
(continues on step V...)
What is evdev?
evdev is the generic input event device driver. It passes the events generated in the kernel (since version 2.6.8) straight to the program, with timestamps.
The evdev driver is able to separate and distinguish events coming from different keyboards and mouses plugged into the computer. The xorg supports evdev input driver module since version 6.9/7.0 . This way, it can get separated input events coming from every seat (keyboard and mouse pair) on the system.
This is a great step compared to previous multiseat solutions, since it makes possible to have multiterminal systems without having to patch neither the kernel nor the X server.
What is Xephyr?
Xephyr is a kdrive based X Server which targets a window on a host X Server as its framebuffer. In other words, it is a piece of software which creates a X server on top of another X server. That will allow us to run as many Xephyr instances as seats we have in our system. Every Xephyr instance will cover the area shown in a given display, and finally, evdev will allow us to separate the different input devices.
The good news
Xephyr is included in the universe repository from Ubuntu.
The bad news
The Xephyr version included in the Ubuntu repository, does not support evdev. I hope in a near future Xephyr comes with evdev upport.
Right now, you will have either to patch the Xephyr sources and compile it, or download an already patched solution. Download links for both solutions are available here.
# wget http://www.c3sl.ufpr.br/multiterminal/howtos/xephyr-precompiled.tar.bz2
# tar -xjf xephyr-precompiled.tar.bz2 --directory /usr/local/
Now it is time to plug your second set of keyboard and mouse. The evdev driver will access the input coming from every device by means of a given event in the form of /dev/input/eventNN. You must obtain the event id associated to every input device.
A new problem arises, since the event number assigned can change (in fact, it changes) between different boots. To solve this problem we well use a wrapper script. The script is the same as proposed here, but modified in order to obtain the event number given the physical connection of the device. We are assuming that the devices will be always plugged in the same position (you can label the back connectors to remember the correct position). Since the physical device addresses do not change between boots, the script can obtain the corresponding event id and match it properly with one physical keyboard or mouse.
Input devices and events, once plugged the second keyboard and mouse:
# cat /proc/bus/input/devices
I: Bus=0011 Vendor=0001 Product=0001 Version=ab41
N: Name="AT Translated Set 2 keyboard"
P: Phys=isa0060/serio0/input0
S: Sysfs=/class/input/input0
H: Handlers=kbd event0
B: EV=120013
B: KEY=4 2000000 3802078 f840d001 f2ffffdf ffefffff ffffffff fffffffe
B: MSC=10
B: LED=7

I: Bus=0011 Vendor=0002 Product=0005 Version=0000
N: Name="ImPS/2 Generic Wheel Mouse"
P: Phys=isa0060/serio1/input0
S: Sysfs=/class/input/input1
H: Handlers=mouse0 event1 ts0
B: EV=7
B: KEY=70000 0 0 0 0 0 0 0 0
B: REL=103

I: Bus=0010 Vendor=001f Product=0001 Version=0100
N: Name="PC Speaker"
P: Phys=isa0061/input0
S: Sysfs=/class/input/input2
H: Handlers=kbd event2
B: EV=40001
B: SND=6

I: Bus=0003 Vendor=0d62 Product=001c Version=0202
N: Name="Darfon USB Combo Keyboard"
P: Phys=usb-0000:00:1d.1-1/input0
S: Sysfs=/class/input/input5
H: Handlers=kbd event4
B: EV=120003
B: KEY=10000 7 ff87207a c14057ff febeffdf ffefffff ffffffff fffffffe
B: LED=7

I: Bus=0003 Vendor=0d62 Product=001c Version=0202
N: Name="Darfon USB Combo Keyboard"
P: Phys=usb-0000:00:1d.1-1/input1
S: Sysfs=/class/input/input6
H: Handlers=kbd event5
B: EV=3
B: KEY=3078 d801d101 1e0000 0 0 0

I: Bus=0003 Vendor=046d Product=c03f Version=2000
N: Name="Logitech USB-PS/2 Optical Mouse"
P: Phys=usb-0000:00:1d.1-2/input0
S: Sysfs=/class/input/input8
H: Handlers=mouse1 event3 ts1
B: EV=7
B: KEY=f0000 0 0 0 0 0 0 0 0
B: REL=103
The Name section will help us to identify the device. The Phys section is the parameter that we will send to the wrapper script in order to start every Xephyr instance.
The Xephyr wrapper
Now, it is time to create the wrapper script. The original one is modified to obtain the event numbers from the physical addresses
# vi /usr/sbin/Xephyr.sh
This is the final wrapper script:
#!/bin/bash

# 20060905 - josean - added get_event() function to obtain eventNN from a physical address
# Original version:
# http://en.wikibooks.org/wiki/Multiterminal_with_Xephyr
# http://www.c3sl.ufpr.br/multiterminal/howtos/Xephyr.sh

trap "" usr1

XEPHYR=/usr/local/bin/Xephyr

get_event()
{
  evento=`grep -A2 $1 /proc/bus/input/devices | grep 'H: Handlers=' | grep --only-matching -e 'event[0-9]*'`
}

args=()

while [ ! -z "$1" ]; do
 if [[ "$1" == "-xauthority" ]]; then
   shift
   if [ ! -z "$1" ]; then
     export XAUTHORITY="$1"
   fi
 elif [[ "$1" == "-display" ]]; then
   shift
   if [ ! -z "$1" ]; then
     export DISPLAY="$1"
   fi
 elif [[ "$1" == "-kbdphys" ]]; then
   shift
   if [ ! -z "$1" ]; then
     get_event $1
     args=("${args[@]}" "-keyboard")
     args=("${args[@]}" "/dev/input/$evento")
   fi
 elif [[ "$1" == "-mousephys" ]]; then
   shift
   if [ ! -z "$1" ]; then
     get_event $1
     args=("${args[@]}" "-mouse")
     args=("${args[@]}" "/dev/input/$evento,5")
   fi
 else
   if ! expr match $1 'vt[0-9][0-9]*' >/dev/null; then
     args=("${args[@]}" "$1")
   fi
 fi

 shift
done

# echo $XEPHYR "${args[@]}" >> /tmp/logXephyr

exec $XEPHYR "${args[@]}"
Finally, be sure to allow the script to be executed.
# chmod +x /usr/sbin/Xephyr.sh
(continues on step V...)
Thursday, September 07, 2006
Multiseat (III): xorg.conf
(...comes from step II)
Changes on the xorg.conf file
Since the system automatically generated a correct configuration file, this step is not really necessary. Anyway, if you need to obtain information about the bus in which your card is plugged, the lspci command will give you such data.
Obtaining the information for the graphic card.
Before making any change, it is advisable to make a backup of the original configuration file. Then edit it using your favorite text editor.
The next step is the edition of the xorg.conf according to your configuration. In particular, we must create the corresponding device, monitor and screen sections for every seats.
If everything was OK, when you log into your computer, you should have either two independent adjacent desktops (Xinerama disabled) or a bigger desktop extended through the two monitors (Xinerama enabled)
Do not worry in this moment about configuring your keyboard layout. This X configuration will not be seen by the final user of the system. The only goal in this moment is to define properly your video hardware in order to have the two monitors working simultaneously.
Take into account that the login greeter will appear in only one of the screens, but as soon as you log into the system you will see your desktop along the two screens.
The next step is to create a true multiseat computer. We will use Xephyr: A software able to act as an intermediary between the input devices and the underlying X.
(Continues on step IV...)
Changes on the xorg.conf file
Since the system automatically generated a correct configuration file, this step is not really necessary. Anyway, if you need to obtain information about the bus in which your card is plugged, the lspci command will give you such data.
Obtaining the information for the graphic card.
# lspci | grep VGA
0000:01:00.0 VGA compatible controller: nVidia Corporation NV34 [GeForce FX 5200] (rev a1)
Before making any change, it is advisable to make a backup of the original configuration file. Then edit it using your favorite text editor.
# cp /etc/X11/xorg.conf /etc/X11/xorg.conf.bak
# vi /etc/X11/xorg.conf
The next step is the edition of the xorg.conf according to your configuration. In particular, we must create the corresponding device, monitor and screen sections for every seats.
Section "Files"
  FontPath "/usr/share/X11/fonts/misc"
# FontPath "/usr/share/X11/fonts/cyrillic"
  FontPath "/usr/share/X11/fonts/100dpi/:unscaled"
  FontPath "/usr/share/X11/fonts/75dpi/:unscaled"
  FontPath "/usr/share/X11/fonts/Type1"
  FontPath "/usr/share/X11/fonts/100dpi"
  FontPath "/usr/share/X11/fonts/75dpi"
  # path to defoma fonts
  FontPath "/var/lib/defoma/x-ttcidfont-conf.d/dirs/TrueType"
EndSection

Section "Module"
  Load "bitmap"
  Load "ddc"
# Load "dri"
  Load "extmod"
  Load "freetype"
  Load "glx"
  Load "int10"
  Load "type1"
  Load "vbe"
EndSection

# ------------------------------------------------------------------------
# Input devices
# ------------------------------------------------------------------------

Section "InputDevice"
  Identifier  "Keyboard-base"
  Driver      "kbd"
EndSection

Section "InputDevice"
  Identifier  "Mouse-base"
  Driver      "mouse"
  Option      "Device" "/dev/input/mice"
EndSection

# ------------------------------------------------------------------------
# Dual head system. Notice the two devices sharing the same BusID
# ------------------------------------------------------------------------

Section "Device"
  Identifier  "Card0.0" # CRT-0 (VGA output)
  Driver      "nvidia"
  VendorName  "nVidia Corporation"
  BoardName   "NV34 [GeForce FX 5200]"
  BusID       "PCI:1:0:0"
  Screen      0
  Option      "NoLogo"
EndSection

Section "Device"
  Identifier  "Card0.1" # CRT-1 (Analog-DVI, DFP-0 : Digital-DVI)
  Driver      "nvidia"
  VendorName  "nVidia Corporation"
  BoardName   "NV34 [GeForce FX 5200]"
  BusID       "PCI:1:0:0"
  Screen      1
  Option      NoLogo"
EndSection

# ------------------------------------------------------------------------
# Monitor section: Most of the parameters are optional
# ------------------------------------------------------------------------

Section "Monitor"
  Identifier   "Monitor0"
  VendorName   "HP"
  ModelName    "HP D8904"
  Option       "DPMS"
  HorizSync    30-70
  VertRefresh  50-160
  DisplaySize  320 240 # CRT 17" (81 DPI @ 1024x768)
EndSection

Section "Monitor"
  Identifier   "Monitor1"
  VendorName   "Compaq"
  ModelName    "Compaq 5500"
  HorizSync    30-54
  VertRefresh  50-120
  DisplaySize  280 210 # CRT 15" (72 DPI @ 800x600)
  Option       "DPMS"
EndSection

# ------------------------------------------------------------------------
# Screen section: Pairing video cards and monitors
# ------------------------------------------------------------------------

Section "Screen"
  Identifier  "Screen0"
  Device      "Card0.0"
  Monitor     "Monitor0"
  SubSection  "Display"
    Depth  24
    Modes  "1024x768" "800x600" "640x480"
  EndSubSection
EndSection

Section "Screen"
  Identifier  "Screen1"
  Device      "Card0.1"
  Monitor     "Monitor1"
  SubSection  "Display"
    Depth  24
    Modes  "800x600" "640x480"
  EndSubSection
EndSection

# ------------------------------------------------------------------------
# Layout section
# ------------------------------------------------------------------------

Section "ServerLayout"
  Identifier   "Multihead"
  Screen 0     "Screen0" 0 0
  Screen 1     "Screen1" LeftOf "Screen0"
  InputDevice  "Keyboard-base" "CoreKeyboard"
  InputDevice  "Mouse-base" "CorePointer"
EndSection

# ------------------------------------------------------------------------
# Additional sections
# ------------------------------------------------------------------------

# Xephyr can not use DRI, so it is not enabled
# Section "DRI"
#   Mode 0666
# EndSection

Section "ServerFlags"
  # Xinerama does not affect this configuration, so it is not enabled
# Option "Xinerama" "on"

  # Even if mouse detection fails, X will start
  Option "AllowMouseOpenFail" "yes"

  # VT switching is disabled
  Option "DontVTSwitch" "yes"

  # X restart (Ctrl+Alt+Backspace) is disabled
  Option "DontZap" "yes"
EndSection

If everything was OK, when you log into your computer, you should have either two independent adjacent desktops (Xinerama disabled) or a bigger desktop extended through the two monitors (Xinerama enabled)
Do not worry in this moment about configuring your keyboard layout. This X configuration will not be seen by the final user of the system. The only goal in this moment is to define properly your video hardware in order to have the two monitors working simultaneously.
Take into account that the login greeter will appear in only one of the screens, but as soon as you log into the system you will see your desktop along the two screens.
The next step is to create a true multiseat computer. We will use Xephyr: A software able to act as an intermediary between the input devices and the underlying X.
(Continues on step IV...)
Multiseat (II): Let's start
(...comes from step I)
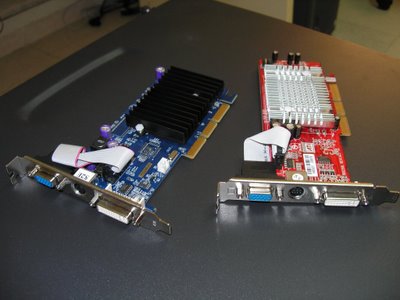
Step by step installation
Requirements
First of all, obviously, we need the hardware. In the prototype here presented, we had this configuration
Additional requirements:
Standard Ubuntu install
In this step it is not necessary to have all your hardware plugged. If you have only a set of KVM (keyboard, video, mouse), that is enough right now. We used a PS/2 keyboard and a PS/2 mouse, and a VGA monitor plugged in the VGA output of the graphic card. Nothing special at the moment.
Insert the Ubuntu CD. The CD of the 6.06 version is a live one, which offers the possibility of being installed on youy hard drive.
Follow the instructions and Install Ubuntu on your hard drive. Your hard drive will be deleted and its contents will be lost. Any spyware and virus you may previously have there, will be lost.
After the installation if everything was OK, you should have an Ubuntu with the X working properly on one of your monitors.
Before going into the next step, we recommend you to enable the root account. May be this is against the philosophy of Ubuntu, but it can be annoying to type sudo just before each command when you have to change many things at one time, such as in this project. After this step, the next commands will have to be executed as the root user. Otherwise, you will have to prepend sudo to all the commands needing root access.
If you want to make changes from another computer in your network, you must install a SSH server
The next step is to download the binary drivers from nVidia, because of limitations of the open source ones in graphic cards having more than one output.
Multihead install
Now it is time to plug the second monitor and modify your system configuration editing your xorg.conf file
(Continues on step III...)

Step by step installation
Requirements
First of all, obviously, we need the hardware. In the prototype here presented, we had this configuration
- Computer: Pentium IV 2.0GHz, 512MB RAM, 20GB hard disk
- Graphic card: nVidia GeForce 5200 AGP 8x, 128MB, VGA + DVI + TV outputs (the blue one on the picture)
- Seat 1: PS/2 keyboard and mouse, 17" CRT monitor (the right one in the photo)
- Seat 2: USB keyboard and mouse, 15" CRT monitor (the left one)
Additional requirements:
- Network connection to a second computer, in order to have remote access during the configuration of the system (It is also possible to do without an additional computer, but this option is not recommendable at all).
- Internet access, to download drivers, additional packages, and (optionally) to keep updated the system.
Standard Ubuntu install
In this step it is not necessary to have all your hardware plugged. If you have only a set of KVM (keyboard, video, mouse), that is enough right now. We used a PS/2 keyboard and a PS/2 mouse, and a VGA monitor plugged in the VGA output of the graphic card. Nothing special at the moment.
Insert the Ubuntu CD. The CD of the 6.06 version is a live one, which offers the possibility of being installed on youy hard drive.
Follow the instructions and Install Ubuntu on your hard drive. Your hard drive will be deleted and its contents will be lost. Any spyware and virus you may previously have there, will be lost.
After the installation if everything was OK, you should have an Ubuntu with the X working properly on one of your monitors.
Before going into the next step, we recommend you to enable the root account. May be this is against the philosophy of Ubuntu, but it can be annoying to type sudo just before each command when you have to change many things at one time, such as in this project. After this step, the next commands will have to be executed as the root user. Otherwise, you will have to prepend sudo to all the commands needing root access.
$ sudo passwd root
If you want to make changes from another computer in your network, you must install a SSH server
# apt-get install openssh-server
The next step is to download the binary drivers from nVidia, because of limitations of the open source ones in graphic cards having more than one output.
# apt-get install nvidia-glx
Multihead install
Now it is time to plug the second monitor and modify your system configuration editing your xorg.conf file
(Continues on step III...)
Wednesday, September 06, 2006
Multiseat computer with Ubuntu
After having spent many hours working with the goal in mind of achieving a multiseat (also called multiterminal) computer, I have decided to write some lines to help anybody interested in building this kind of system.
Update (20090619): New tutorial for Multiseat in Ubuntu 9.04 available
The concept of multiseat
A multiseat computer is a particular configuration which allow a computer to be used for several people simultaneously. There are many fields of application of such kind of systems: Companies can achieve big savings on hardware and maintenance while giving service to many users. The main sites where this can be useful are all those in which users do not have great graphical requirements, i.e. almost everything except CPU hungry applications, such as recent 3D games or video encoding.
The sites which most can benefit from this technique are typically libraries, schools, public Internet access sites, and in general almost every site intended for administrative work.
Obviously the underlying operating system is a Linux distribution. Unfortunately, nowadays there are still too much sites tightly tied to proprietary operating systems, due to the fact that they must use some corporate applications developed for exclusive use on such proprietary operating systems. I hope in a near future that will be just bad memories belonging to the past, since the main trend in current developments is based on corporate intranets offering the necessary tools and software to the employees.
The configuration
I have choosen Ubuntu 6.06LTS as the OS, and a dual head video card to obtain two seats from a computer.
Why Ubuntu?
Yeah, why Ubuntu?... I have also made myself this question many times in recent days! I must confess that almost all my previous Linux experience had been with Fedora Core / RedHat systems (dealing with them since RedHat 5.x versions). I had only worked previously with Debian and its derived distributions in just a few ocasions, so obviously there were some new things to learn.
The reason for choosing Ubuntu is its popularity as a desktop based distribution. Several governments are choosing or creating Ubuntu or other Debian based distributions, and the supporting community is growing quickly. I think it is the distribution in which this kind of systems can catch most interest.
Why the 6.06LTS version?
A system based on recent software is easier to be reproduced, and will be more interesting for users willing to reproduce it than an alternative based on outdated software. Apart from beta versions, this is the latest Ubuntu version available right now.
The main goal is to give here the necesary steps to reproduce this configuration. A second goal is to ease the installation as much as possible. The ideal scenario would be to install only standard packages, without the need to use patched pieces of code. With the latest kernel inprovements, and the changes in xorg this is already possible in some cases.
Why a dual-head video card?
Let's start saying that the use of different cards with one video output each one would result in
a easier configuration, involving less packages of software. The reason to use dual head cards is just to adjust to a more realistic situation. The use of different cards, means either using additional PCI or PCIe cards.
The first ones (PCI) are almost impossible to obtain in most local stores (at least in Spain). You will have to buy them in sites such as eBay or you will have to use old recovered computer parts.
Our particular case was to create a prototype with evaluation purposes. Depending on the success of the prototype (stability and users satisfaction) the project can be extended to about 50 computers. We worked initially with cards coming from dead computers (very old cards manufactured between 1994 and 1997). That was a total waste of time: problems with video drivers, available video modes too poor for today screens, and the impossibility to extend the prototype for a large number of computers.
The second option is to use a modern motherboard having PCIe slots, but that means spending money in buying new hardware. In our project, the plans are intended to use computers whith motherboards having AGP slots. The only reasonable option for such computers is to plug in every computer a dual head AGP graphic card.
The last step was choosing the graphic card. We decided to use a card widely available and supported (i.e. using ATI or nVidia chips) with dual output, and in the lowest price range. The first prototype was built using a nVidia 5200 AGP 8x, with VGA output (D-sub), TV output (unused) and DVI-I output (either analog output using an adaptor or digital output). This card is well supported and widely available for about 30 euros (40 USD). For the second prototype, we are using a ATI 9250 AGP 8x.
(Continues on step II ...)
UPDATE: There is a new tutorial covering the setup of a multiseat computer with Ubuntu 8.04
Update (20090619): New tutorial for Multiseat in Ubuntu 9.04 available
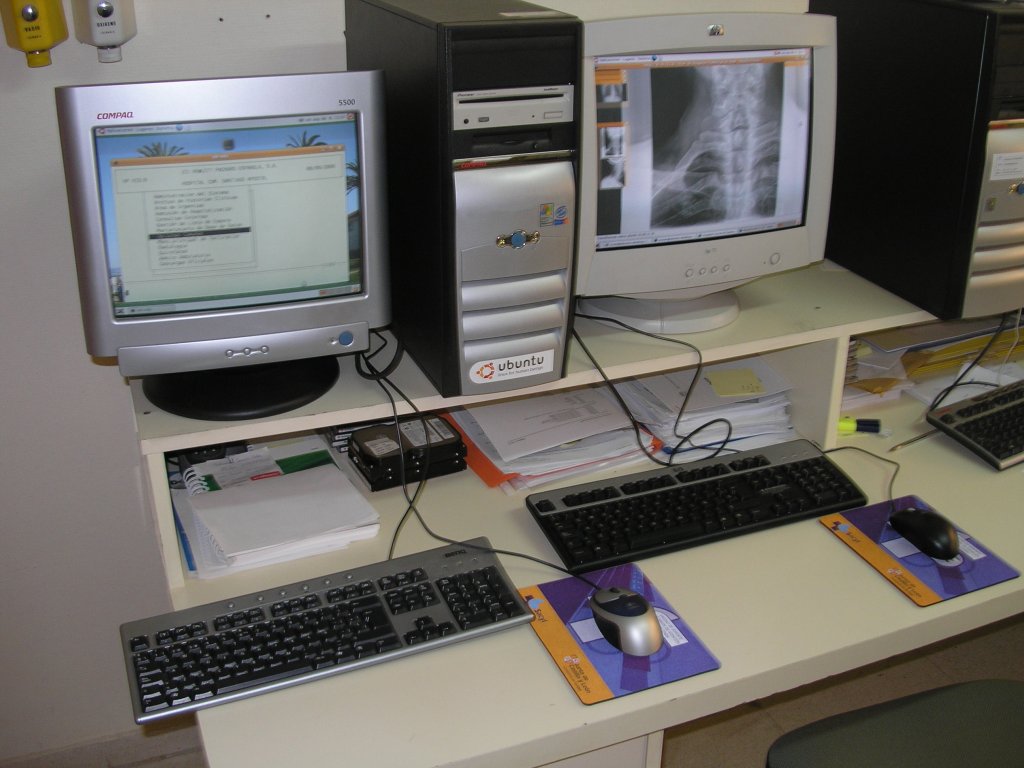
The concept of multiseat
A multiseat computer is a particular configuration which allow a computer to be used for several people simultaneously. There are many fields of application of such kind of systems: Companies can achieve big savings on hardware and maintenance while giving service to many users. The main sites where this can be useful are all those in which users do not have great graphical requirements, i.e. almost everything except CPU hungry applications, such as recent 3D games or video encoding.
The sites which most can benefit from this technique are typically libraries, schools, public Internet access sites, and in general almost every site intended for administrative work.
Obviously the underlying operating system is a Linux distribution. Unfortunately, nowadays there are still too much sites tightly tied to proprietary operating systems, due to the fact that they must use some corporate applications developed for exclusive use on such proprietary operating systems. I hope in a near future that will be just bad memories belonging to the past, since the main trend in current developments is based on corporate intranets offering the necessary tools and software to the employees.
The configuration
I have choosen Ubuntu 6.06LTS as the OS, and a dual head video card to obtain two seats from a computer.
Why Ubuntu?
Yeah, why Ubuntu?... I have also made myself this question many times in recent days! I must confess that almost all my previous Linux experience had been with Fedora Core / RedHat systems (dealing with them since RedHat 5.x versions). I had only worked previously with Debian and its derived distributions in just a few ocasions, so obviously there were some new things to learn.
The reason for choosing Ubuntu is its popularity as a desktop based distribution. Several governments are choosing or creating Ubuntu or other Debian based distributions, and the supporting community is growing quickly. I think it is the distribution in which this kind of systems can catch most interest.
Why the 6.06LTS version?
A system based on recent software is easier to be reproduced, and will be more interesting for users willing to reproduce it than an alternative based on outdated software. Apart from beta versions, this is the latest Ubuntu version available right now.
The main goal is to give here the necesary steps to reproduce this configuration. A second goal is to ease the installation as much as possible. The ideal scenario would be to install only standard packages, without the need to use patched pieces of code. With the latest kernel inprovements, and the changes in xorg this is already possible in some cases.
Why a dual-head video card?
Let's start saying that the use of different cards with one video output each one would result in
a easier configuration, involving less packages of software. The reason to use dual head cards is just to adjust to a more realistic situation. The use of different cards, means either using additional PCI or PCIe cards.
The first ones (PCI) are almost impossible to obtain in most local stores (at least in Spain). You will have to buy them in sites such as eBay or you will have to use old recovered computer parts.
Our particular case was to create a prototype with evaluation purposes. Depending on the success of the prototype (stability and users satisfaction) the project can be extended to about 50 computers. We worked initially with cards coming from dead computers (very old cards manufactured between 1994 and 1997). That was a total waste of time: problems with video drivers, available video modes too poor for today screens, and the impossibility to extend the prototype for a large number of computers.
The second option is to use a modern motherboard having PCIe slots, but that means spending money in buying new hardware. In our project, the plans are intended to use computers whith motherboards having AGP slots. The only reasonable option for such computers is to plug in every computer a dual head AGP graphic card.
The last step was choosing the graphic card. We decided to use a card widely available and supported (i.e. using ATI or nVidia chips) with dual output, and in the lowest price range. The first prototype was built using a nVidia 5200 AGP 8x, with VGA output (D-sub), TV output (unused) and DVI-I output (either analog output using an adaptor or digital output). This card is well supported and widely available for about 30 euros (40 USD). For the second prototype, we are using a ATI 9250 AGP 8x.
(Continues on step II ...)
UPDATE: There is a new tutorial covering the setup of a multiseat computer with Ubuntu 8.04
Subscribe to:
Posts (Atom)