Monday, September 21, 2009

Flash Development on Linux (III): swc libraries

In this stage, we already know how to set up our Flash development environment on Linux, and how to compile basic programs in Flash (Actionscript).

If we intend to develop something a bit more advanced, it is very common to need precompiled libraries. These libraries are packaged in the form of .swc files, so we are going to know how to create such libraries, and how to use them once created.
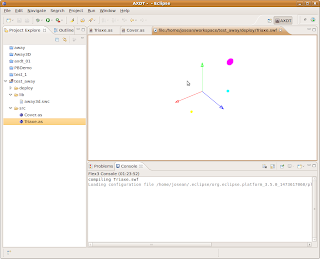


The AXDT plugin form Eclipse includes a simplified version of the Flex SDK provided by Adobe. The SDK from Adobe includes additional tools, and in this scenario, in order to create a swc library, we need the component compiler (compc). This compiler can be found included with the Flex SDK tools.

The installation of such environment presents some minor difficulties that we are going to solve here:

First of all, we go to the Adobe website to download the open source Flex SDK. In this tutorial we have worked with the version 3.4.0.9271 (Aug 18, 2009)


$ sudo mkdir /opt/flex3

Then, we will choose an appropriate directory to unpack the compiler in such place. Notice the -a option: It is necessary in order to convert text files (CR/LF characters) properly.


$ sudo unzip -a -d /opt/flex3 flex_sdk_3.4.0.9271_mpl.zip

Optionally, you can remove the files on the bin directory intended for other platforms


$ sudo rm -f /opt/flex3/bin/*.exe /opt/flex3/bin/*.bat

Once uncompressed, we need to give the execution permissions to the files in the bin folder. The zip file definitely was created on a non-Linux system.


$ sudo chmod +x /opt/flex3/bin/*

To illustrate the usage of the component compiler, we are going to create the .swc library file corresponding to the Away3D library. Away3D is an open source flash 3D library which is quickly becoming one of the most popular Flash libraries on its field.

Once again, we download the source code of the library. Since we are developing for Flash 9, we download the 2.x version. If you intend to develop Flash 10 programs, you can go with the 3.x version. In our sample, we are working with the 2.4.0 version.

We create a directory for the library inside our workspace directory and uncompress there the away3D source code.


$ mkdir $HOME/workspace/away3d
$ unzip -a -d $HOME/workspace/away3d away3d_2_4_0.zip

The component compiler, apart from having a very limited documentation has a syntax a bit inconvenient. We can not indicate to the compiler to include all the classes under a directory tree, but we have to enumerate all the classes that we want to pack into the .swc file. In the case of the Away3D library, that means that the command line to invoke the compiler must contain the name of about 320 classes (including their package names).

To avoid that, we are going to create a compilation script in a more or less automated way. Since I am not an expert on shell scripts, suggestions on how to improve / ease this script are welcome.


$ cd $HOME/workspace/away3d
$ echo '/opt/flex3/bin/compc -compiler.source-path . -output ./away3d.swc -include-classes \' > compile_away3d
$ find . -name '*.as' | grep -v 'away3d/test' | sed -e 's/\.as/ \\/g' -e 's/\.\///g' -e 's/\//\./g' -e '$s/ \\//g' >> compile_away3d
$ chmod +x compile_away3d


The compile_away3d script file now has the command line necessary to compile the library, excluding the sample sources under the test directory. All we need to do right now is just to invoke the compilation script. Have a look inside it before if you are interested in a closer examination or do not worry about it if you just want to compile the library disregarding the details.


$ ./compile_away3d

Once in this step, if the compiler complains about a duplicate variable definition on the lensFlare.as file (line 118), everything is going right.

The as3 language manages the scope of the variables in a different manner than the usual one (as, for example in C++ or Java). Block scope does not exist, and the minimal scope for variables is the whole function. There is a bug related to that in the current latest stable version (2.4.0) of the Away3D library (the bug has already been corrected in the svn version), so we change a fragment of code in the lensFlare.as in order to avoid having a duplicate variable declaration. The change consists just in getting the variable declaration (ctVal) out of the conditions, and declare it just once.


if(useBurning && _burnClip)
{
var ctVal:Number;
if(_burnMethod == LensFlare.BURN_METHOD_BRIGHTNESS)
{
var bsVal:Number = 5*burnFactor/_projectionLength;
bsVal = bsVal < 1 ? 1 : bsVal;
bsVal = bsVal > 3 ? 3 : bsVal;
//TweenMax.to(_burnClip, 0, {colorMatrixFilter:{contrast:bsVal, brightness:bsVal}});
//TODO: setup colorMatrixFilter tween without TweenMax
ctVal = 500*burnFactor/_projectionLength;
_ct = new ColorTransform(1, 1, 1, 1, ctVal, ctVal, ctVal, 0);
_burnClip.transform.colorTransform = _ct;
}
else if(_burnMethod == LensFlare.BURN_METHOD_COLOR_TRANSFORM)
{
ctVal = 500*burnFactor/_projectionLength;
_ct = new ColorTransform(1, 1, 1, 1, ctVal, ctVal, ctVal, 0);
_burnClip.transform.colorTransform = _ct;
}
}


Now, the library compiles without any kind of problem. We will see the away3d.swc file (about 590KB size) on the current directory.

Wednesday, September 16, 2009

Flash development on Linux (II)

Once you have set up your Flash / Flex development environment on your Linux box, you are ready to compile your first application.

Open Eclipse with the AXDT perspective

Create your first project. This is done under the menu item File -> new -> AXDT project.... Give a name to your project and select a directory (usually under the directory that you chose as your workspace).


After the creation of the project, you can start to add your source files. The compiler supports both kind of files: as3 (ActionScript) as well as .mxml files. We are going to compile a sample from the AXDT site.

Go to the menu and choose File -> new -> AS3 file


Choose the folder to store the source file (usually src). Optionally you can organise your code in packages. Using packages is optional but becomes more necessary as you project grows. Better being used to manage packages from the beginning. The sources will be placed in a subdirectory tree structure according to the package structure. Finally, give a name to your source file: As in many other OOP languages, the file name must be the same as the name of the class defined in such source file.

After the creation of the source file, write down (or copy + paste) the file contents. At this point, your environment should look more or less like this:


Once created and saved your source file, you can compile it. Just click on the menu item Run -> Run As -> Compile and Open a SWF File. You will see some options to configure the compiler but do not worry about such options right now. You can maintain the default values.


If everything has gone right, you will see your Flash application running on the Eclipse IDE . The swf file created will be placed on the target location (default is deploy), so you can copy such file and publish it on your website.

Tuesday, September 15, 2009

Flash development on Linux

Recently I am getting more and more interested in flash development. Since the adoption of actionscript 3 (as3) as programming language Flash is becoming more and more a serious option to develop applications

The main inconvenient that I find is the fact that the development tools are almost just available for the Windows environment. This is an operating system that I stopped using almost two years ago, and I do not have any intention to come back to such family of operating systems.

I am into free software, so I will try to do flash development based on open source tools as much as I can.

This is my development environment:
A four years old Pentium IV based computer, running a 32 bit version of Ubuntu 9.04

Eclipse (you will need to have Java -JRE- installed in order to run Eclipse)
AXDT: This is a set of plug-ins for the Eclipse platform that enables the user to write ActionScript3 code in such a framework.

We can start having a look at the installation instructions on the AXDT site.

The first step is to download the "Eclipse IDE for Java Developers". In our particular case, we will choose the 32bit Linux version (eclipse-java-galileo-linux-gtk.tar.gz)

Then we will have to uncompress that somewhere on our hard disk. We have chosen to install it on the /opt directory.


$ sudo tar -C /opt -xzf java-galileo-linux-gtk.tar.gz


After that, we launch the Eclipse application. First thing will be to choose the workspace directory. We can maintain the default option: just a directory called "workspace" under our home directory.

In the menu, we choose Help -> Install new software...

Click on the "Add..." button, and type the following:

Name: Eclipse IMP
Location: http://download.eclipse.org/technology/imp/updates/


On the lower right corner of the main Eclipse window, you will see an indicator. The program is getting a list of available software components. Some seconds after that, it will show you those components. Do not choose anyone in this moment, and continue to the next step.

Name: AXDT
Location: http://update.axdt.org/


Choose (at least) the following packages:
Axdt AS3 Feature
Flex3SDK Feature


Then click on the "Next >" button, accept the licence and proceed to install the AXDT + Flex SDK framework.

If the system complains about unsatisfied dependencies or requirements, be sure to have installed the basic packages of the Eclipse base environment. I have found in some installations that such repositories are not initially enabled.

Name: Galileo
Location: http://download.eclipse.org/releases/galileo

Name: Eclipse project
Location: http://download.eclipse.org/eclipse/updates/3.5

Once installed, restart Eclipse

Go to the menu: Window -> Open perspective -> Other... -> AXDT


You are now ready to start to develop Flash / Flex programs on your Linux box. You can find a simple example of how to compile your first Flash program on Linux.

Thursday, July 16, 2009

Multiseat with nVidia card

A new configuration of the dual seat system has been tested with a different hardware.

Computer: HP dc7700 ultra-slim 1GB RAM, 250GB HD

The computer comes with an integrated Intel graphics card:
$ lspci | grep VGA
00:02.0 VGA compatible controller: Intel Corporation 82Q963/Q965 Integrated Graphics Controller (rev 02)


Unfortunately, this card has only one output, so we had to replace the original card. We added another one, in particular one suggested by HP (we are limited since this is a small form factor PC with important limitations in the physical size of PCI cards).

We added a PCIe nVidia card with dual output:
$ lspci | grep VGA
01:00.0 VGA compatible controller: nVidia Corporation Quadro NVS 290 (rev a1)


First of all, we encountered some problems:
Once installed the new card, we were unable to boot the live version of Ubuntu 9.04. We had to revert back to the intel card, install the Ubuntu distribution, then plug the nVidia card and finally boot the computer with the system already installed. Doing the installation in this way everything worked properly and we were able to continue with the setup of the dual seat system.

In order to setup the nVidia cards, we choose to use the proprietary drivers (nvidia-glx-180 and two dependent packages: nvidia-180-libvdpau, nvidia-180-modaliases) and we also installed the package nvidia-settings

The tool nvidia-settings is useful to generate the proper xorg.conf. We need this file to tell the system that we are going to have a multihead setup.


In our particular case, this is the xorg.conf generated file

# nvidia-settings: X configuration file generated by nvidia-settings
# nvidia-settings: version 1.0 (buildd@palmer) Sun Feb 1 20:21:04 UTC 2009

Section "ServerLayout"
Identifier "Layout0"
Screen 0 "Screen0" 0 0
InputDevice "Keyboard0" "CoreKeyboard"
InputDevice "Mouse0" "CorePointer"
EndSection

Section "Files"
EndSection

Section "Module"
Load "dbe"
Load "extmod"
Load "type1"
Load "freetype"
Load "glx"
EndSection

Section "ServerFlags"
Option "Xinerama" "0"
EndSection

Section "InputDevice"
# generated from default
Identifier "Mouse0"
Driver "mouse"
Option "Protocol" "auto"
Option "Device" "/dev/psaux"
Option "Emulate3Buttons" "no"
Option "ZAxisMapping" "4 5"
EndSection

Section "InputDevice"
# generated from default
Identifier "Keyboard0"
Driver "kbd"
EndSection

Section "Monitor"
# HorizSync source: edid, VertRefresh source: edid
Identifier "Monitor0"
VendorName "Unknown"
ModelName "LG L1953HM"
HorizSync 30.0 - 83.0
VertRefresh 56.0 - 75.0
Option "DPMS"
EndSection

Section "Device"
Identifier "Device0"
Driver "nvidia"
VendorName "NVIDIA Corporation"
BoardName "Quadro NVS 290"
EndSection

Section "Screen"
Identifier "Screen0"
Device "Device0"
Monitor "Monitor0"
DefaultDepth 24
Option "TwinView" "1"
Option "TwinViewXineramaInfoOrder" "CRT-0"
Option "metamodes" "CRT-0: 1280x1024 +0+0, CRT-1: 1280x1024_60 +0+1024"
SubSection "Display"
Depth 24
EndSection

Section "Device"
Identifier "Device0"
Driver "nvidia"
VendorName "NVIDIA Corporation"
BoardName "Quadro NVS 290"
EndSection

Section "Screen"
Identifier "Screen0"
Device "Device0"
Monitor "Monitor0"
DefaultDepth 24
Option "TwinView" "1"
Option "TwinViewXineramaInfoOrder" "CRT-0"
Option "metamodes" "CRT-0: 1280x1024 +0+0, CRT-1: 1280x1024_60 +0+1024"
SubSection "Display"
Depth 24
EndSubSection
EndSection


Having done these changes, the rest of the setup is just the same as with the ATI graphics card.
The seats now do support glx functions (glxgears, screensavers, and so)

Thursday, June 18, 2009

Multiseat in Ubuntu 9.04

Multiseat configuration in Ubuntu 9.04 is very similar to that of Ubuntu 8.04. Some software components have been updated, so the overall system has some improvements over the previous version, while other problems are still remaining.


The computer is just identical to that used in the previous version:
Pentium 4 at 3GHz, 512MB of RAM and a 80GB hard disk. The video card is an ATI Radeon X300 PCIe by Gigabyte with two outputs (VGA and DVI). On the DVI output we have a DVI to VGA converter so we can connect two simple VGA analog monitors. The monitors are just two generic TFT/LCD displays with a resolution of 1280x1024.

1.- We install the Ubuntu 9.04 version on the computer. You can do this using a live-media, such as a live-CD/live-DVD or a live-USB. Since most of the computers today support booting from USB, we recommend you to choose the USB option. The installation process will be much faster compared to installing from a CD/DVD.

2.- Update your system to the latest available packages. You can do that either using the graphical tools (update manager / synaptic) or using the command line in a terminal:
$ sudo apt-get update


3.- Install some additional components (xserver-xephyr and wmctrl). These are not included in the default installation, but they are in the official repositories. These packages are necessary in order to obtain the desired multiseat system.

$ sudo apt-get install xserver-xephyr wmctrl


Before starting any modifications related to the multiseat configuration, you should do the necessary adjustments and setup for your particular scenario (network configuration, user creation, etc). Some tools and applications related to Gnome configuration do not work when the user is logged in a multiseat session, because the operating system detect multiple gnome-sessions and some of the system configuration tools are not able to create the necessary locks.

It is very convenient to maintain a copy of the original configuration of the two files (/etc/X11/xorg.conf and /etc/gdm/gdm.conf) that are going to be modified, since they can be necessary if you want to come back to the initial configuration.

Once configured your network and created your users (we suggest you creating something like user1/user2, uleft/uright if you are going to have generic users) you can proceed with the process of multiseat setup.


Initially, after the default installation, the system will start with the two displays in "clone" mode.
If we have a look at the output of the xrandr command, we will see the details about our current setup. In our particular case, we obtain this output:

$ xrandr -q
Screen 0: minimum 320 x 200, current 1280 x 1024, maximum 1280 x 1200
VGA-0 connected 1280x1024+0+0 (normal left inverted right x axis y axis) 338mm x 270mm
1280x1024 60.0*+ 75.0 60.0*
1152x864 75.0
1024x768 75.0 60.0
832x624 74.6
800x600 75.0 60.3
640x480 75.0 59.9
720x400 70.1
DVI-0 connected 1280x1024+0+0 (normal left inverted right x axis y axis) 338mm x 270mm
1280x1024 60.0*+ 75.0 60.0*
1152x864 75.0
1024x768 75.0 70.1 60.0
832x624 74.6
800x600 72.2 75.0 60.3
640x480 75.0 72.8 59.9
720x400 70.1
S-video disconnected (normal left inverted right x axis y axis)


Next thing, we edit /etc/X11/xorg.conf to indicate how to obtain an "extended desktop" configuration. If you have any doubts on this topic, you can find additional information on the official Ubuntu wiki: manual multihead setup.

On recent Linux versions, several things related to device management are being changed and moved to other parts of the system, such as hal and udev, so we can see that there is no need to indicate anything related to keyboard and mouse in the xorg.conf file.

After having done a backup of the original xorg.conf file, we modify it in order to indicate the new setup with two monitors. We also include some convenient options (section "ServerFlags") in a multiseat system.

Section "Device"
Identifier "Card0"
BoardName "ATI Technologies Inc RV370 5B60 [Radeon X300 (PCIE)]"
Driver "ati"
BusID "PCI:1:0:0"
Option "Monitor-VGA-0" "Mon-VGA"
Option "Monitor-DVI-0" "Mon-DVI"
EndSection

Section "Monitor"
Identifier "Mon-VGA"
Option "DPMS"
EndSection

Section "Monitor"
Identifier "Mon-DVI"
Option "DPMS"
Option "Below" "Mon-VGA"
EndSection

Section "Screen"
Identifier "Screen-base"
Device "Card0"
Monitor "Mon-VGA"
DefaultDepth 24
Subsection "Display"
Depth 24
Modes "1280x1024"
Virtual 1280 2048
EndSubSection
EndSection

Section "ServerFlags"
# Even if mouse detection fails, X will start
Option "AllowMouseOpenFail" "yes"

# VT switching is disabled
Option "DontVTSwitch" "yes"

# X restart (Ctrl+Alt+Backspace) is disabled
Option "DontZap" "yes"
EndSection


Notice that this time, we have defined a vertical setup of the monitors. This is just to test if 3D acceleration works with horizontal and vertical dimensions of the virtual screen lower (or equal) than 2048 pixels. If you feel more comfortable with an horizontal setup, just use leftOf or rightOf instead of below, and change the virtual size to the proper one according to the desired layout.

After having done this change, if we restart the X server we will see a vertical desktop with these characteristics:

$ xrandr -q
Screen 0: minimum 320 x 200, current 1280 x 2048, maximum 1280 x 2048
VGA-0 connected 1280x1024+0+0 (normal left inverted right x axis y axis) 338mm x 270mm
1280x1024 60.0*+ 75.0 60.0*
1152x864 75.0
1024x768 75.0 60.0
832x624 74.6
800x600 75.0 60.3
640x480 75.0 59.9
720x400 70.1
DVI-0 connected 1280x1024+0+1024 (normal left inverted right x axis y axis) 338mm x 270mm
1280x1024 60.0*+ 75.0 60.0*
1152x864 75.0
1024x768 75.0 70.1 60.0
832x624 74.6
800x600 72.2 75.0 60.3
640x480 75.0 72.8 59.9
720x400 70.1
S-video disconnected (normal left inverted right x axis y axis)


Once we have modified the xorg.conf file and having already obtained a big desktop covering the two monitors (either with an horizontal or with a vertical layout), the next thing is to configure gdm to launch two Xephyr sessions, one for every seat.

Previously, you will need to obtain the information related to the input events on your system.

$ ls -la /dev/input/by-path/ | grep event | grep kbd
lrwxrwxrwx 1 root root 9 2009-06-18 13:11 pci-0000:00:1d.2-usb-0:2:1.0-event-kbd -> ../event5
lrwxrwxrwx 1 root root 9 2009-06-18 13:11 platform-i8042-serio-0-event-kbd -> ../event3

$ ls -la /dev/input/by-path/ | grep event | grep mouse
lrwxrwxrwx 1 root root 9 2009-06-18 13:11 pci-0000:00:1d.2-usb-0:1:1.0-event-mouse -> ../event4
lrwxrwxrwx 1 root root 9 2009-06-18 13:11 platform-i8042-serio-1-event-mouse -> ../event8


In this case, we have a set of PS2 keyboard + mouse for one seat, and a pair of USB keyboard + mouse for the second one. The values that you are obtaining here will be used to configure the corresponding input device for every seat.

The next step is to create a launcher in order to execute Xephyr with the proper parameters and input events. To achieve that, we create a file that will be used as a launcher script. You can name the file and place it as you consider most appropriated. We have chosen to create it as /usr/sbin/Xephyr-path.sh

Use your favorite editor (vi, gedit, ...) to create it, and do not forget to make it executable by root (the file owner).

$ sudo gedit /usr/sbin/Xephyr-path.sh
$ sudo chmod 744 /usr/sbin/Xephyr-path.sh


You should create a file with something like these contents (change the xkblayout parameter according to your language):

$ cat /usr/sbin/Xephyr-path.sh


#!/bin/bash

# 200906 - josean
# http://netpatia.blogspot.com/

trap "" usr1

XEPHYR=/usr/bin/Xephyr
DISPLAY=:0
XAUTHORITY=/var/lib/gdm/:0.Xauth

args=()

while [ ! -z "$1" ]; do
if [[ "$1" == "-kbdpath" ]]; then
shift
if [ ! -z "$1" ]; then
args=("${args[@]}" "-keybd")
args=("${args[@]}" "evdev,,device=/dev/input/by-path/$1,xkbrules=xorg,xkbmodel=evdev,xkblayout=es")
fi
elif [[ "$1" == "-mousepath" ]]; then
shift
if [ ! -z "$1" ]; then
args=("${args[@]}" "-mouse")
args=("${args[@]}" "evdev,,device=/dev/input/by-path/$1")
fi
else
args=("${args[@]}" "$1")
# echo "+++ args $1 +++" >> /tmp/logXephyr
fi
shift
done

# Next line is just to create a log file with the invocation parameters, for debug purposes
echo $XEPHYR "${args[@]}" >> /tmp/logXephyr
exec $XEPHYR "${args[@]}"


After the creation of this script, you can proceed with the modifications to the /etc/gdm/gdm.conf file.
On the [servers] section of gdm.conf, we comment out the rules corresponding to the original layout and define the new one. We modify the file to create the base X server and two Xephyr sessions (one for every seat) over the base X.

# ****************************************************************************

[servers]

# 0=Standard
#
# Means that DISPLAY ":0" will start an X server as defined in the
# [server-Standard] section.

# ****************************************************************************

# Multiseat setup (200906)

0=Xephyr0
1=Xephyr1
2=Xephyr2

[server-Xephyr0]
name=Xephyr0
command=/usr/bin/X -br -dpms -s 0
handled=false
flexible=false

[server-Xephyr1]
name=Xephyr1
command=/usr/sbin/Xephyr-path.sh -br -screen 1280x1024 -kbdpath platform-i8042-serio-0-event-kbd -mousepath platform-i8042-serio-1-event-mouse
handled=true
flexible=false

[server-Xephyr2]
name=Xephyr2
command=/usr/sbin/Xephyr-path.sh -br -screen 1280x1024 -kbdpath pci-0000:00:1d.2-usb-0:2:1.0-event-kbd -mousepath pci-0000:00:1d.2-usb-0:1:1.0-event-mouse
handled=true
flexible=false

# ****************************************************************************


Notice that this is the script where you will have to indicate what the input devices (their physical connections) are for every seat.

The second change to the gdm.conf file is related to the greeter. There are still things that need to be done manually.

We encounter the already known problem of having every Xephyr window properly placed (one Xephyr session appearing on every display). The current Xephyr version does not support the geometry parameter that most X applications include, so it is not possible to place the Xephyr window in the desired place. In order to circumvent this problem, we create a script that will be called instead of doing a direct call to the session greeter. Such script invokes some command line tools in order to place every Xephyr window just in the place where we want to have it. We will use the following command line tools: xwininfo, wmctrl to move one of the Xephyr sessions to the second monitor, so that they do not overlap anymore. That is the reason why we installed the wmctrl package.

In the [daemon] section of gdm.conf change the reference to the original greeter for a reference to a new script. This script, apart for invoking the greeter, will place properly every Xephyr window:

# ****************************************************************************

[daemon]

# The greeter for attached (non-xdmcp) logins. Change gdmlogin to gdmgreeter
# to get the new graphical greeter.
# Greeter=/usr/lib/gdm/gdmgreeter
Greeter=/usr/sbin/Xephyr-login.sh

# ****************************************************************************


We will have to create the script responsible of the greeter/login (in our case, /usr/sbin/Xephyr-login.sh). This script will be executed by the gdm user, so we create a file owned by gdm and give execution permission just for that user.

$ sudo gedit /usr/sbin/Xephyr-login.sh
$ sudo chown gdm:gdm /usr/sbin/Xephyr-login.sh
$ sudo chmod 744 /usr/sbin/Xephyr-login.sh


After the creation of such script, it should look like this:

$ cat /usr/sbin/Xephyr-login.sh

#!/bin/bash
# /usr/sbin/Xephyr-login.sh

XAUTH_BASE=/var/lib/gdm/:0.Xauth
DISPL_BASE=:0

XEP=$(XAUTHORITY=$XAUTH_BASE xwininfo -root -children -display :0 | grep "Xephyr on :1" --max-count=1)
echo ${XEP} >> /tmp/logXephyrLogin

# assign values to positional parameters to obtain the id (first parameter) of the Xephyr window
set ${XEP}
DISPLAY=$DISPL_BASE XAUTHORITY=$XAUTH_BASE wmctrl -i -r $1 -e 0,0,1024,-1,-1
# echo $1 >> /tmp/logXephyrLogin_1

/usr/lib/gdm/gdmlogin


In our case, we move one of the sessions 1024 pixels vertically (remember that our layout consists of two 1280x1024 displays vertically aligned).

As you can see, when the greeter is expected to be invoked, the wrapper script (including greeter invocation) is executed instead. The user(s) finally sees every greeter in a different display and the rest of the process is almost unnoticeable.

The last comment is about the greeter. The old style gdmlogin was some time ago replaced by a more modern gdmgreeter. There is something wrong about screen size detection with this default gdm greeter (gdmgreeter). It always try to start at a resolution of 1600x1200, so we had to change to the old greeter (gdmlogin) which detects properly the screen resolutions of the Xephyr sessions.

Maybe gdmgreeter uses xrandr to detect the resolution of every Xephyr session, since 1600x1200 is the max output reported by xrandr on every Xephyr session. The Xephyr windows are in fact resizable by means of xrandr, so we are not sure if this is a bug of xrandr that sould only report the current size, or a bug of gdmgreeter assuming that it must change the window size to the biggest available.

$ DISPLAY=:1 xrandr -q
Screen 0: minimum 160 x 160, current 1280 x 1024, maximum 1600 x 1200
default connected 1280x1024+0+0 (normal left inverted right x axis y axis) 0mm x 0mm
1600x1200 0.0
1400x1050 0.0
1280x960 0.0
1280x1024 0.0*
1152x864 0.0
1024x768 0.0
832x624 0.0
800x600 0.0
720x400 0.0
480x640 0.0
640x480 0.0
640x400 0.0
320x240 0.0
240x320 0.0
160x160 0.0


In order to avoid this problem, we use gdmlogin instead of gdmgreeter.

The Ubuntu 9.04 version of the multiseat setup, achieves some improvements over previous versions:
* Mouse wheel works properly.
* Keyboard led indicators are not messed up.

Updated 2009/06/22: Some minor changes
Updated 2009/07/16: Some changes in Xephyr-path.sh and Xephyr-login.sh
Access control is now enabled in both Xephyr sessions. The previous configuration had access control disabled (-ac option).

Friday, June 12, 2009

Fedora 11 on the Asus EeePC 701

The linux distribution Fedora 11 (also know by its codename Leonidas) has been recently published, and it is available as a Live-ISO. So, I decided to download such image and create a Live-USB in order to test it on the Asus EeePC 701.

Fedora 11 includes many improvements over previous releases in aspects such as security and virtualization. Additional improvements are also done in order to add features to this distribution for those using it in desktops PCs as well as for those who use Fedora in servers.

The distribution includes support for the ext4 filesystem, and several sources remark that the distribution boots in about 20 seconds (obviously it takes longer to boot when we tested it in form of a live-USB). People is reporting times just a few seconds shorter (faster) than Ubuntu 9.04, whose boot time is better than acceptable in my opinion.

Anyway, the goal of this blog entry is not to do an in-deep review of Fedora 11 and their new features. We just pretend to analyze if it can be considered a viable alternative in order to be installed on a Asus Eee PC 701, given the particular limitations and the components of such netbook.

Inside the Fedora wiki, there is a page telling us that such netbook is fully supported, requiring no additional modifications or particular adjustments.

In fact, the components that I tested (audio card, wireless network adapter and integrated camera) are properly detected an they work fine with zero additional setup.


So, we can conclude telling that this is a very recommendable distribution for those who want the fully potential and advantages of a complete distribution, without the limitations and excessive simplifications of other distributions specifically intended for notebooks. You will also have a huge repository of applications and utilities ready to be installed.

Note: Versión en español:
Fedora 11 en el Asus EeePC 701

Sunday, May 24, 2009

Ubuntu 9.04 on Asus Eee PC 701

I have one Asus EeePC 701 since December 2007. Since then, I have tested several operating systems on this small computer, but my interests have focused mainly on the Ubuntu Linux distribution.

As soon as Ubuntu 8.04 was available, I removed the original Xandros coming with the computer, and I replaced it with the Ubuntu operating system. There were some difficulties at the beginning, mainly related to unsupported hardware components.

Ubuntu 8.10 was an improvement over the previous version. The things started to go better and it was more or less easy to fine tune the system in order to get all the hardware components working properly.

I have been following the Ubuntu 9.04 distribution and testing all the releases in form of live USB since Alfa 4. The main advantage of this release is the full support out of the box of all the hardware of this computer.

When the final version of the Ubuntu 9.04 release came out, I decided to make a clean install of such version. The previous versions had suffered many modifications in order to get the whole system working properly and I wanted to know how this release would behave without modifications.

The results could not have been better. The hardware works very well with no modifications at all. The wifi card detected the networks on my neighbourhood, and I could connect to my WEP access point as soon as I choose it and typed the passphrase.

The second great improvement is related to speed. If I make a side by side comparison of the dmesg (/var/log/messages) information between the current release (9.04) and the previous one (8.10), I can see that my system boots up in much less time than the previous version. The SSD disk is recognised and managed much better than before. This fact gives a much more usable and responsive system than with previous versions.

You should notice that this is not a system tuned up to boost the boot time, but just a fresh install with almost no modifications compared to the default install. The only modifications are choosing ext2 instead of ext3 as filesystem, and the lack of swap partition.


17:00 Press the power button
17:08 Asus EeePC initial screen
17:10 GRUB screen
17:13 GRUB launches default option
17:42 GDM greeter. Waiting user/password
17:48 Typing: User + password + Intro
18:07 WiFi connection established. System ready!!!

We can see that the system gets ready in 67 seconds:
  • 10s : BIOS
  • 9s : User interaction: GRUB + GDM login / greeter
  • 48s : System startup: Loading + session start + WiFi connect

Just if anyone is interested: In order to have the time counter in the video, I have placed the EeePC computer just in front of the screen of a desktop computer (a four years old P4 system) and issued the following command:

$ xclock -digital -strftime "%M:%S" -face courier-140 -update 1

The desktop system is also running Ubuntu 9.04, of course ;-)

The goal of this blog entry is not to do a review of Ubuntu 9.04, but just to evaluate its usability in this system. The netbook of the test has just 512MB of physical memory. This small amount is more than enough if we intend to use the computer in ordinary tasks. In fact, the system uses about 130MB of memory having still about 350MB available for applications.


We can see some improvements and changes over previous releases, such as the system to manage the network connections and the new graphical aspect of the notifications


Hardware components such as audio controller and VGA camera work with no modifications at all


Even with such a limited piece of hardware, we can still view youtube HD videos (video credits).


ACPI related functions such as suspend, resume and power off work properly without modifications. Most of the hotkeys also work right. May be the only exception is the key to enable and disable the WiFi card. This is the only thing that I have found so far that needs to be manually adjusted.


So, the bottom line is that if you want a notebook with a standard distribution without limitations and the same features (except those imposed by a modest hardware) as your desktop system, I do recommend 100% to use the last Ubuntu release on your system.

Thursday, February 19, 2009

Multiframe DICOM to Flash video

Following with the series of articles dealing with web based visualization of DICOM images, we are going to ilustrate a way of viewing multiframe ultrasound DICOM images.

As in the previous article, we have used just open source software for every action or transformation carried out.

This solution appeared in one ocasion when we were looking for a quick solution to share some cardiology studies among cardiologists. We wanted a solution with minimal software requirements, and fully multiplatform, in order to ease and promote the migration to open source workstations in public healthcare organizations.

One of the goals was to preserve the original quality of the contents, so we should preserve the original frame rate of the sequence as well as the original image quality (lossless transformations).


1.- The first step is to extract individual frames of the multiframe object. This step can be done using the dcmtk tools.

$ dcmj2pnm +Fa +ob multiframe.dcm /tmp/multiframe_


Use the +o modifier to indicate the output format. +ob to generate BMP, +on to generate PNG (You can test other available formats, but be careful to avoid loosy formats, such as Jpeg)

2.- Optional step: Obtain the frame-rate if you want to maintain the original values. I am not sure if the video format used (.flv) has a maximum allowed frame rate (59.94 is mentioned in some sites). O the other side, you will need a powerfull machine if you want to display the output at such high framerates. Anyway, you can alway create a slow motion version of the original content using lower framerates. If you choose this option, you must inform the user about the variation with respect to the original content.

$ dcmdump +P "0018,0040" multiframe.dcm


3.- Once you have done the extraction of the frames, you should convert the set of images to the desired video format (.flv in this example). We have tested with ffmpeg and mencoder. Both of them have their own advantages and limitations. Be sure to have the necessary codecs (flv) installed on your system.

Example 1: Assuming a framerate of 30 fps, bmp frames, and maintaining the original size (800x564 in our case).

$ ffmpeg -r 30 -i /tmp/multiframe_.%d.bmp -f flv -s 800x564 -sameq -an -r 30 multiframe.flv


Example 2: If you prefer to try with mencoder (png frames, 30 fps):
$ mencoder "mf:///tmp/multiframe_.%d.png" -mf fps=30:type=png -ovc lavc -lavcopts vcodec=flv -o multiframe.flv


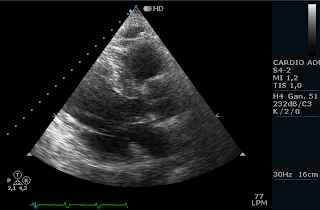
Below, there is just an illustrative video, but you can see the full quality DICOM multiframe ultrasound video.

Saturday, February 14, 2009

Flash DICOM viewer

Some days ago, I passed the mark of seven years working in the field of healthcare related software. Due to the fact of working in this area, I have had the opportunity to learn about some topics and concepts that otherwise could remain just unknown for me. One of the topics that I find of particular interest is that related to medical imaging.

There has been a huge work during many years in order to create a standard for medical imaging. The result of such work is DICOM. At the begining most manufacturers preferred to tie their clients by the use of propietary and closed formats. Fortunately, in the last years most manufactures have chosen to follow the standards (with more or less success) opening a very interesting field for software development related to medical imaging.

One of the difficulties when dealing with DICOM imaging is the fact of having many differences compared to other image formats. In general, we can not use tools intended for other kind of images (such as those coming from digital cameras) to work with DICOM medical images.

The manufacturers of hardware equipment for medical imaging acquisition do usually provide their own diagnostic stations with specialized software, so the doctor (radiologist, cardiologist) can interpret the images.

Apart from the main diagnostics stage, it is often interesting to distribute images along with the medical report. If a doctor has derived a patient to radiology, the doctor would appreciate the inform with the results being attached to some key images. Given the fact that the medical data is evolving in order to replace the traditional paper by electronic reports, it becomes a necessity to provide remote access to medical imaging.

So, we can distinguish two kind of viewers: Diagnostic viewers, intended for those practicians that should emit a diagnostics from the examination of the image, and simplified viewers, intended just to allow the possibility of viewing the relevant imaging data, acting as a complement to the medical report.


If we want to achieve a fast and efficient deployment of an imaging viewing solution, we must consider a web based DICOM viewer. Since we are not dealing with simple imaging formats, we must consider environments able to act as RIAs (Rich Internet Applications), and that narrows a lot the available options.

For the development of a web based DICOM viewer, we can consider the following frameworks:
  1. DHTML: javascript, DOM, ...
  2. ActiveX
  3. Silverlight / Moonlight
  4. Java: In the form of Java Applet (browser embedded), Java Web Start applications or the new Java FX platform.
  5. Flash based viewer
Let us see the advantages and limitations of every possible option:
  1. The first option may have limitations in order to manage and being able to perform some tasks in DICOM images, such as lightning or darkening images.
  2. The second option (still adopted by many manufactures) has not ever been considered in our case, since one of the goals is to achieve a real multiplatform solution. That is a real must if we consider the fact that many public administrations and healthcare departments are migrating their systems to Linux based stations.
  3. The third one is something that deserves to be tested. If it is a real multiplatform environment, that can be an option for development of a web DICOM viewer in the form of a RIA.
  4. The option number four sounds really good. In fact a Java Web Start DICOM viewer would be a killer app in this field.
  5. The fifth option sounds good, but Flash (Actionscript) has many differences compared to Java: May be it is more limited as a programming language, but has many possibilities regarding the user interface and to present information to the user. We have chosen to start working in Flash, just to test what we can achieve.
Our first development was Stratos-viewer, a simple flash based DICOM viewer, but powerful enough in the cases where no advanced utilities were necessary. An online demo of the viewer is available.


Addendum (2009/02/18):
References to other flash based DICOM viewers: