As in the previous article, we have used just open source software for every action or transformation carried out.
This solution appeared in one ocasion when we were looking for a quick solution to share some cardiology studies among cardiologists. We wanted a solution with minimal software requirements, and fully multiplatform, in order to ease and promote the migration to open source workstations in public healthcare organizations.
One of the goals was to preserve the original quality of the contents, so we should preserve the original frame rate of the sequence as well as the original image quality (lossless transformations).

1.- The first step is to extract individual frames of the multiframe object. This step can be done using the dcmtk tools.
$ dcmj2pnm +Fa +ob multiframe.dcm /tmp/multiframe_
Use the
+o modifier to indicate the output format. +ob to generate BMP, +on to generate PNG (You can test other available formats, but be careful to avoid loosy formats, such as Jpeg)2.- Optional step: Obtain the frame-rate if you want to maintain the original values. I am not sure if the video format used (.flv) has a maximum allowed frame rate (59.94 is mentioned in some sites). O the other side, you will need a powerfull machine if you want to display the output at such high framerates. Anyway, you can alway create a slow motion version of the original content using lower framerates. If you choose this option, you must inform the user about the variation with respect to the original content.
$ dcmdump +P "0018,0040" multiframe.dcm
3.- Once you have done the extraction of the frames, you should convert the set of images to the desired video format (.flv in this example). We have tested with
ffmpeg and mencoder. Both of them have their own advantages and limitations. Be sure to have the necessary codecs (flv) installed on your system.Example 1: Assuming a framerate of
30 fps, bmp frames, and maintaining the original size (800x564 in our case).$ ffmpeg -r 30 -i /tmp/multiframe_.%d.bmp -f flv -s 800x564 -sameq -an -r 30 multiframe.flv
Example 2: If you prefer to try with mencoder (
png frames, 30 fps):$ mencoder "mf:///tmp/multiframe_.%d.png" -mf fps=30:type=png -ovc lavc -lavcopts vcodec=flv -o multiframe.flv
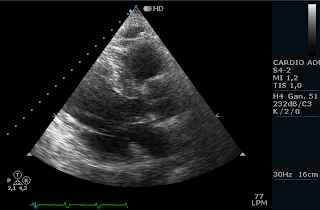
Below, there is just an illustrative video, but you can see the full quality DICOM multiframe ultrasound video.
3 comments:
Hi netpatia, thanks for sharing this cool demo, does flash lose the image quality of dicom file? The dicom processing is on flash player side or server side? If it's on server side, the flash image may lose some dicom features. if it is on player side, would that cause client machine's memory and cpu issue? Thanks.
...does flash lose the image quality of dicom file?
In the first sample, when the video is encoded with ffmpeg, the use of the parameter -sameq is just to avoid losses, so the resulting video maintains the original quality.
Obviously, the sample hosted on youtube has been converted with big losses.
...The dicom processing is on flash player side or server side?
On the server side. You can observe the command line tools to do the frame extraction as well as the video encoding of such frames.
...the flash image may lose some dicom features
Well, but you can obtain the dicom headers and show them in the application (viewer), the same way as it is done on the flash dicom viewer
Hola Josean,
Nos gustaría incorporar funcionalidades que parece que tú conoces bien en nuestra plataforma Medting.com
Si estás interesado me gustaría charlar, envíanos un email a info [arroba] medting.com
Gracias
Post a Comment