Sunday, May 24, 2009

Ubuntu 9.04 on Asus Eee PC 701

I have one Asus EeePC 701 since December 2007. Since then, I have tested several operating systems on this small computer, but my interests have focused mainly on the Ubuntu Linux distribution.

As soon as Ubuntu 8.04 was available, I removed the original Xandros coming with the computer, and I replaced it with the Ubuntu operating system. There were some difficulties at the beginning, mainly related to unsupported hardware components.

Ubuntu 8.10 was an improvement over the previous version. The things started to go better and it was more or less easy to fine tune the system in order to get all the hardware components working properly.

I have been following the Ubuntu 9.04 distribution and testing all the releases in form of live USB since Alfa 4. The main advantage of this release is the full support out of the box of all the hardware of this computer.

When the final version of the Ubuntu 9.04 release came out, I decided to make a clean install of such version. The previous versions had suffered many modifications in order to get the whole system working properly and I wanted to know how this release would behave without modifications.

The results could not have been better. The hardware works very well with no modifications at all. The wifi card detected the networks on my neighbourhood, and I could connect to my WEP access point as soon as I choose it and typed the passphrase.

The second great improvement is related to speed. If I make a side by side comparison of the dmesg (/var/log/messages) information between the current release (9.04) and the previous one (8.10), I can see that my system boots up in much less time than the previous version. The SSD disk is recognised and managed much better than before. This fact gives a much more usable and responsive system than with previous versions.

You should notice that this is not a system tuned up to boost the boot time, but just a fresh install with almost no modifications compared to the default install. The only modifications are choosing ext2 instead of ext3 as filesystem, and the lack of swap partition.


17:00 Press the power button
17:08 Asus EeePC initial screen
17:10 GRUB screen
17:13 GRUB launches default option
17:42 GDM greeter. Waiting user/password
17:48 Typing: User + password + Intro
18:07 WiFi connection established. System ready!!!

We can see that the system gets ready in 67 seconds:
  • 10s : BIOS
  • 9s : User interaction: GRUB + GDM login / greeter
  • 48s : System startup: Loading + session start + WiFi connect

Just if anyone is interested: In order to have the time counter in the video, I have placed the EeePC computer just in front of the screen of a desktop computer (a four years old P4 system) and issued the following command:

$ xclock -digital -strftime "%M:%S" -face courier-140 -update 1

The desktop system is also running Ubuntu 9.04, of course ;-)

The goal of this blog entry is not to do a review of Ubuntu 9.04, but just to evaluate its usability in this system. The netbook of the test has just 512MB of physical memory. This small amount is more than enough if we intend to use the computer in ordinary tasks. In fact, the system uses about 130MB of memory having still about 350MB available for applications.


We can see some improvements and changes over previous releases, such as the system to manage the network connections and the new graphical aspect of the notifications


Hardware components such as audio controller and VGA camera work with no modifications at all


Even with such a limited piece of hardware, we can still view youtube HD videos (video credits).


ACPI related functions such as suspend, resume and power off work properly without modifications. Most of the hotkeys also work right. May be the only exception is the key to enable and disable the WiFi card. This is the only thing that I have found so far that needs to be manually adjusted.


So, the bottom line is that if you want a notebook with a standard distribution without limitations and the same features (except those imposed by a modest hardware) as your desktop system, I do recommend 100% to use the last Ubuntu release on your system.

Thursday, February 19, 2009

Multiframe DICOM to Flash video

Following with the series of articles dealing with web based visualization of DICOM images, we are going to ilustrate a way of viewing multiframe ultrasound DICOM images.

As in the previous article, we have used just open source software for every action or transformation carried out.

This solution appeared in one ocasion when we were looking for a quick solution to share some cardiology studies among cardiologists. We wanted a solution with minimal software requirements, and fully multiplatform, in order to ease and promote the migration to open source workstations in public healthcare organizations.

One of the goals was to preserve the original quality of the contents, so we should preserve the original frame rate of the sequence as well as the original image quality (lossless transformations).


1.- The first step is to extract individual frames of the multiframe object. This step can be done using the dcmtk tools.

$ dcmj2pnm +Fa +ob multiframe.dcm /tmp/multiframe_


Use the +o modifier to indicate the output format. +ob to generate BMP, +on to generate PNG (You can test other available formats, but be careful to avoid loosy formats, such as Jpeg)

2.- Optional step: Obtain the frame-rate if you want to maintain the original values. I am not sure if the video format used (.flv) has a maximum allowed frame rate (59.94 is mentioned in some sites). O the other side, you will need a powerfull machine if you want to display the output at such high framerates. Anyway, you can alway create a slow motion version of the original content using lower framerates. If you choose this option, you must inform the user about the variation with respect to the original content.

$ dcmdump +P "0018,0040" multiframe.dcm


3.- Once you have done the extraction of the frames, you should convert the set of images to the desired video format (.flv in this example). We have tested with ffmpeg and mencoder. Both of them have their own advantages and limitations. Be sure to have the necessary codecs (flv) installed on your system.

Example 1: Assuming a framerate of 30 fps, bmp frames, and maintaining the original size (800x564 in our case).

$ ffmpeg -r 30 -i /tmp/multiframe_.%d.bmp -f flv -s 800x564 -sameq -an -r 30 multiframe.flv


Example 2: If you prefer to try with mencoder (png frames, 30 fps):
$ mencoder "mf:///tmp/multiframe_.%d.png" -mf fps=30:type=png -ovc lavc -lavcopts vcodec=flv -o multiframe.flv


Below, there is just an illustrative video, but you can see the full quality DICOM multiframe ultrasound video.

Saturday, February 14, 2009

Flash DICOM viewer

Some days ago, I passed the mark of seven years working in the field of healthcare related software. Due to the fact of working in this area, I have had the opportunity to learn about some topics and concepts that otherwise could remain just unknown for me. One of the topics that I find of particular interest is that related to medical imaging.

There has been a huge work during many years in order to create a standard for medical imaging. The result of such work is DICOM. At the begining most manufacturers preferred to tie their clients by the use of propietary and closed formats. Fortunately, in the last years most manufactures have chosen to follow the standards (with more or less success) opening a very interesting field for software development related to medical imaging.

One of the difficulties when dealing with DICOM imaging is the fact of having many differences compared to other image formats. In general, we can not use tools intended for other kind of images (such as those coming from digital cameras) to work with DICOM medical images.

The manufacturers of hardware equipment for medical imaging acquisition do usually provide their own diagnostic stations with specialized software, so the doctor (radiologist, cardiologist) can interpret the images.

Apart from the main diagnostics stage, it is often interesting to distribute images along with the medical report. If a doctor has derived a patient to radiology, the doctor would appreciate the inform with the results being attached to some key images. Given the fact that the medical data is evolving in order to replace the traditional paper by electronic reports, it becomes a necessity to provide remote access to medical imaging.

So, we can distinguish two kind of viewers: Diagnostic viewers, intended for those practicians that should emit a diagnostics from the examination of the image, and simplified viewers, intended just to allow the possibility of viewing the relevant imaging data, acting as a complement to the medical report.


If we want to achieve a fast and efficient deployment of an imaging viewing solution, we must consider a web based DICOM viewer. Since we are not dealing with simple imaging formats, we must consider environments able to act as RIAs (Rich Internet Applications), and that narrows a lot the available options.

For the development of a web based DICOM viewer, we can consider the following frameworks:
  1. DHTML: javascript, DOM, ...
  2. ActiveX
  3. Silverlight / Moonlight
  4. Java: In the form of Java Applet (browser embedded), Java Web Start applications or the new Java FX platform.
  5. Flash based viewer
Let us see the advantages and limitations of every possible option:
  1. The first option may have limitations in order to manage and being able to perform some tasks in DICOM images, such as lightning or darkening images.
  2. The second option (still adopted by many manufactures) has not ever been considered in our case, since one of the goals is to achieve a real multiplatform solution. That is a real must if we consider the fact that many public administrations and healthcare departments are migrating their systems to Linux based stations.
  3. The third one is something that deserves to be tested. If it is a real multiplatform environment, that can be an option for development of a web DICOM viewer in the form of a RIA.
  4. The option number four sounds really good. In fact a Java Web Start DICOM viewer would be a killer app in this field.
  5. The fifth option sounds good, but Flash (Actionscript) has many differences compared to Java: May be it is more limited as a programming language, but has many possibilities regarding the user interface and to present information to the user. We have chosen to start working in Flash, just to test what we can achieve.
Our first development was Stratos-viewer, a simple flash based DICOM viewer, but powerful enough in the cases where no advanced utilities were necessary. An online demo of the viewer is available.


Addendum (2009/02/18):
References to other flash based DICOM viewers:

Thursday, May 29, 2008

Beijing map

Since the Beijing 2008 Olympic Games are approaching, I think it would be of general interest to have maps of Chinese cities available to people travelling to China.


Google Maps does not provide maps of Chinese cities on its international version. Only some roads are shown on their maps. They have another different server (DITU) to provide maps of Chinese cities, but this server does not show the satellite imagery.


So, I am working on a mashup to combine satellite imagery from Google Maps and the maps provided by Google Ditu. The final result is shown in this Beijing Map mashup.

UPDATE (2008/06/01): There is an improved version of the Beijing Map using a modified GMercatorProjection object. Now the markers on the map can be managed just as they are in standard maps. You can still have a look at the first prototype of the Beijing Map, just if you are interested. The original link has been changed to the last version of the map.

Tuesday, May 27, 2008

Google Maps: Geocoder

Looking for a geocoder?

I have been doing some tests with the Google Maps API. The intention is to start a series of articles covering different topics related to maps, geopositioning and cartography.


The first one is a general purpose geocoder. The geocoder allows you to obtain the coordinates of a point, either given its address or because you know its position on the map.


Hope you will find this topic of interest.

Monday, March 24, 2008

Multiseat in Ubuntu 8.04 (III)

<< step (II) <<

After the previous modifications, our system is almost ready to use. Unfortunately there are still some pending details to be resolved.

The first problem is to achieve having every Xephyr screen properly placed (one display for every Xephyr). The current Xephyr version does not support the geometry parameter that most X applications include, so it is not possible to place the Xephyr window in the desired place (i.e. one Xephyr on every display).

To workaround this problem we can use some command line tools in order to place every Xephyr window just in the place where we want to have it. We will need the following packages: xwininfo, wmctrl. Install them with your favorite tool (synaptic, apt-get).

The next step is to modify the gdm.conf file in order to invoke a wrapping script when calling the gdm greeter.

In our example, we have the following script wrapper placed in /usr/sbin just as we did with the Xephyr wrapper (be sure to give the script execution permissions):


#!/bin/bash
# /usr/sbin/Xephyr-login.sh

XAUTHORITY=/var/lib/gdm/:0.Xauth
XEP=$(xwininfo -root -children -display :0 | grep "Xephyr on :1" --max-count=1)
echo XEP ${XEP} >> /tmp/logXephyr
set -- ${XEP}
XAUTHORITY=/var/lib/gdm/:0.Xauth
DISPLAY=:0 wmctrl -i -r $1 -e 0,1280,0,-1,-1
/usr/lib/gdm/gdmlogin
# /usr/lib/gdm/gdmgreeter


In our particular case, we have tho displays at 1280x1024. Having the display resolutions hardcoded in such a script is very awful, so consider it just as a dirty and quick workaround to have things working. Experienced bash script coders with nicer solutions are welcome :-)

As we said before, you have to modify the /etc/gdm/gdm.conf file (the gdm greeter call) in order to call this script. The script will move one of the Xephyr sessions to the right display while maintaining the other on the left display.


# The greeter for attached (non-xdmcp) logins. Change gdmlogin to gdmgreeter
# to get the new graphical greeter.
# Greeter=/usr/lib/gdm/gdmgreeter
Greeter=/usr/sbin/Xephyr-login.sh


As you can see, when the greeter is expected to be invoked, the wrapper script (including greeter invocation) is executed instead.

The last comment is about the greeter. There is something wrong about screen size detection with the default gdm greeter (gdmgreeter). It always try to start at a resolution of 1600x1200, so we had to change to the old greeter (gdmlogin) which detects properly the screen resolutions of the Xephyr sessions.

Thursday, February 21, 2008

Multiseat in Ubuntu 8.04 (II)

<< step (I) <<

Once we have modified the xorg.conf file and we have a big desktop in the two monitors, the next thing is to configure gdm to launch the two Xephyr sessions.

Previously, you will need to obtain the information related to the input events on your system. The way of referencing the events has been recently modified. Now, the operating system allows you to access the events via their paths, and on some systems, via their names. The script wrapper to launch Xephyr it is now simpler compared to the previous version. It is not necessary any more to match the events with the physical locations (as we did through /proc/bus/input/devices)

You must obtain the path-based symbolic links to the events corresponding to your keyboards and mouses. In our particular case, whe have two USB keyboards, one USB mouse and one PS/2 mouse.


# ls -la /dev/input/by-path/ | grep event | grep kbd
lrwxrwxrwx 1 root root 9 2008-02-20 09:49 pci-0000:00:1d.2-usb-0:1:1.0-event-kbd -> ../event5
lrwxrwxrwx 1 root root 9 2008-02-20 09:49 pci-0000:00:1d.2-usb-0:2:1.0-event-kbd -> ../event6

# ls -la /dev/input/by-path/ | grep event | grep mouse
lrwxrwxrwx 1 root root 9 2008-02-20 09:49 pci-0000:00:1d.3-usb-0:1:1.0-event-mouse -> ../event8
lrwxrwxrwx 1 root root 9 2008-02-20 09:49 platform-i8042-serio-1-event-mouse -> ../event2


The invocation of the Xephyr wrapper in the (/etc/gdm/gdm.conf) file will be something like this (remember to do a backup of your files before doing any modification!):


# ****************************************************************************

# Modificaciones multiseat (20080109)

0=Xephyr0
1=Xephyr1
2=Xephyr2

[server-Xephyr0]
name=Xephyr0
command=/usr/bin/X -br -dpms -s 0
handled=false
flexible=false

[server-Xephyr1]
name=Xephyr1
command=/usr/sbin/Xephyr-path.sh -display :0 -br -xauthority /var/lib/gdm/:0.Xauth -screen 1280x1024 -kbdpath pci-0000:00:1d.2-usb-0:2:1.0-event-kbd -mousepath platform-i8042-serio-1-event-mouse
handled=true
flexible=false

[server-Xephyr2]
name=Xephyr2
command=/usr/sbin/Xephyr-path.sh -display :0 -br -xauthority /var/lib/gdm/:0.Xauth -screen 1280x1024+1280+0 -kbdpath pci-0000:00:1d.2-usb-0:1:1.0-event-kbd -mousepath pci-0000:00:1d.3-usb-0:1:1.0-event-mouse
handled=true
flexible=false

# ****************************************************************************


Notice that the Xepyr wrapper is called Xephyr-path.sh (just to remark the modification). If you prefer to reference the devices by its name instead of the path, obtain the names in a similar way (have a look at /dev/input/by-name/) and do the necessary modifications on the wrapper.

Since the previous version, xserver-xephyr has been modified so the script is slightly different from the old one. Place the script somewhere in your computer (and remember to give it execution permissions) so it can be invoked when gdm starts. In our prototype, the wrapper is placed at /usr/sbin/Xephyr-path.sh


#!/bin/bash

# 20080109..20080221 - josean
# http://netpatia.blogspot.com/

trap "" usr1

XEPHYR=/usr/bin/Xephyr

args=()

while [ ! -z "$1" ]; do
if [[ "$1" == "-xauthority" ]]; then
shift
if [ ! -z "$1" ]; then
export XAUTHORITY="$1"
fi
elif [[ "$1" == "-display" ]]; then
shift
if [ ! -z "$1" ]; then
export DISPLAY="$1"
fi
elif [[ "$1" == "-kbdpath" ]]; then
shift
if [ ! -z "$1" ]; then
args=("${args[@]}" "-keybd")
args=("${args[@]}" "evdev,,device=/dev/input/by-path/$1,xkbrules=xorg,xkbmodel=evdev,xkblayout=es")
fi
elif [[ "$1" == "-mousepath" ]]; then
shift
if [ ! -z "$1" ]; then
args=("${args[@]}" "-mouse")
args=("${args[@]}" "evdev,,device=/dev/input/by-path/$1,WHEELRelativeAxisButtons 6 7")
fi
else
args=("${args[@]}" "$1")
echo "+++ args $1 +++" >> /tmp/logXephyr
fi
shift
done

echo $XEPHYR -ac "${args[@]}" >> /tmp/logXephyr
exec $XEPHYR -ac "${args[@]}"


Notice the changes, mainly in the options passed to the evdev driver for mouse and keyboard.

Another significant change on the wrapper script is the removal of the line...

elif ! expr match $1 'vt[0-9][0-9]*' >/dev/null; then

...from the 6.06 version. Now, the parameters related to virtual terminals are not filtered, so they are passed in the final invocation. In our prototype, the two seats share the same vt (vt9) and this seems to be no problem at all. If you have more seats or you experience some problem, maybe you will need to filter the vt parameters in the final Xephyr call.

Currently, the mouse wheel (vertical scroll) is not working. The option WHEELRelativeAxisButtons is just to try to get it working, but without success at the moment. Unfortunately there is not much documentation about evdev and its options. If somebody achieves to manage the mouse wheel, feedback is welcome.

The good news is that the keyboard mapping seems to work properly. After dozens of trials with parameters (keyboard layouts, mapping, geometry), an updated package of xserver-xephyr was published some days ago. The new package corrected a bug in the path locations where evdev was looking for keyboard definition files. Now everything works perfect, you just have to choose the language layout for your keyboard (Spanish in our example).

If you test the system at this stage, you will probably see just only one login window. There is still a couple of things to do before your system is ready to use.

>> step (III) >>

Tuesday, February 19, 2008

Asus Eee PC: Hardware support in Ubuntu 8.04

Software tested: Ubuntu 8.04 alfa 4 + updates available on 20080219
Hardware environment: Asus Eee PC 4G (Black Galaxy)

Wifi:

The wifi chipset - Atheros AR2425 (AR5007EG) - is identified, and the propietary drivers are loaded.


Sadly, right now, wifi can not be used unless you install the appropriate patches. The dmesg command shows an error message: Hardware revision not supported, so the driver has not support for that piece of hardware.


394-[ 41.672159] ath_hal: module license 'Proprietary' taints kernel.
395-[ 41.802765] ath_hal: 0.9.18.0 (AR5210, AR5211, AR5212, RF5111, RF5112, RF2413, RF5413)
396-[ 42.159082] ACPI: Battery Slot [BAT0] (battery present)
397:[ 42.223421] wlan: 0.8.4.2 (0.9.3.3)
398-[ 42.450675] ath_pci: 0.9.4.5 (0.9.3.3)
399-[ 42.451801] ACPI: PCI Interrupt 0000:01:00.0[A] -> GSI 18 (level, low) -> IRQ 18
400-[ 42.451824] PCI: Setting latency timer of device 0000:01:00.0 to 64
401-[ 42.500081] wifi%d: unable to attach hardware: 'Hardware revision not supported' (HAL status 13)
402-[ 42.500114] ACPI: PCI interrupt for device 0000:01:00.0 disabled


Wired Ethernet:

Hardware on the Eee PC according to the original Xandros: Atheros Technology Corp. L2 100 Mbit Ethernet Adapter. Ubuntu 8.04 detects it as Attansic Technology Corp. L2 100 Mbit Ethernet Adapter and loads the correspondig drivers (atl2). The wired network seem to work properly. I have found just a small bug in the counter of the outbound traffic (always zero).

The original Xandros uses
Atheros(R) L2 Ethernet Network Driver - version 1.0.40.4

while Ubuntu uses
Attansic(R) L2 Ethernet Network Driver - version 1.0.40.2


As you can imagine Atheros and Attansic are just the same right now.

ACPI:
Suspend: You can suspend the computer (it takes a long time but finally it does suspend). When you restore, everything seems to be right. The only small detail is that the screen brightness does not maintain the previous settings. The screen brightness is set to max when you restore. You only have to adjust the brightness.

Power off: The live CD powers off properly. Once installed you have to press the power button for several seconds to power the computer off.

CPU frequency: Not tested

Audio:

It seems to work right. Some ocassional strange noises. Maybe not still 100% supported, but it works well enough to be usable without modifications.

Camera:

The video camera works out of the box. just be sure to have the camera enabled on the BIOS. The system loads the uvcvideo drivers and the camera is just ready to use.


Special buttons:
I have tested the suspend, Wifi on/off and brightness adjustment buttons. They work properly with no need for previous configuration.

Multiseat computer with Ubuntu 8.04

The goal of this guide is to achieve a multiseat (also called multiterminal) computer so that more than one user can work simultaneously with the computer.

Update (20090619): New tutorial for Multiseat in Ubuntu 9.04 available


In our particular case, we want to obtain a computer for two users, and as a constraint we want to use only one video card. Obviously the card will be a multihead one.

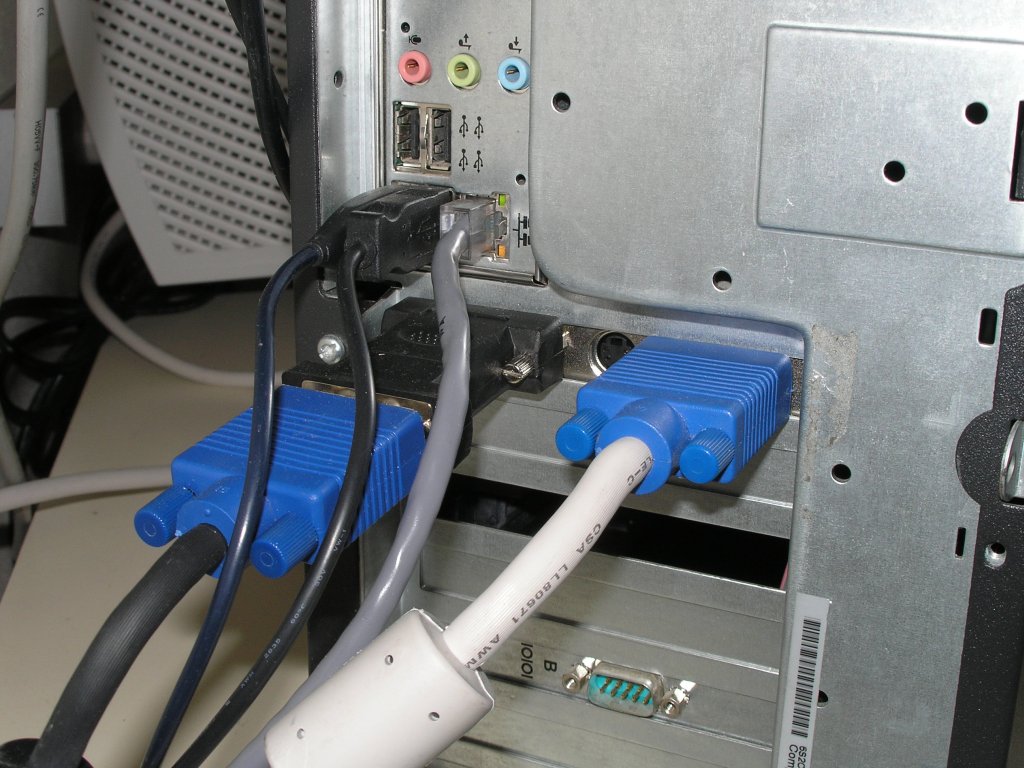
Our hardware can be considered as a low cost PC: The computer is equiped with a Pentium 4 at 3GHz, 512MB of RAM and a 80GB hard sisk. The video card is a Radeon X300 PCIe by ATI with two outputs (VGA and DVI). On the DVI output we have a DVI to VGA converter so we can connect two simple VGA monitors.

What to do step by step:

1.- Install the latest available version of Ubuntu 8.04 on your hard disk. We started the first prototype with the alfa 2 version and several of the problems that we encountered have been already fixed.

2.- After the installation do a package update to be sure that your system has the latest available packages.

One of the main changes in the multihead configuration is the use of xrandr. First of all you must plug the two monitors to your graphic card and obtain your configuration details. Read carefully the instructions of xrandr. The video out connections (VGA, DVI) are referenced with different names depending on your card manufacturer.


# xrandr -q
Screen 0: minimum 320 x 200, current 2560 x 1024, maximum 2560 x 1024
VGA-0 connected 1280x1024+0+0 (normal left inverted right x axis y axis) 337mm x 270mm
1280x1024 60.0*+ 75.0 59.9
1152x864 75.0
1024x768 75.1 70.1 60.0
832x624 74.6
800x600 72.2 75.0 60.3
640x480 75.0 72.8 60.0
720x400 70.1
DVI-0 connected 1280x1024+1280+0 (normal left inverted right x axis y axis) 337mm x 270mm
1280x1024 60.0*+ 75.0 59.9
1152x864 75.0
1024x768 75.1 70.1 60.0
832x624 74.6
800x600 72.2 75.0 60.3
640x480 75.0 72.8 60.0
720x400 70.1
S-video disconnected (normal left inverted right x axis y axis)


Once you have this information, you can modify your /etc/X11/xorg.conf file. It is very advisable to make a backup of the original (working) configuration file.

This is the xorg.conf for the prototype here presented:


# xorg.conf (X.Org X Window System server configuration file)

Section "Module"
Load "dri"
Load "drm"
Load "glx"
EndSection

Section "DRI"
Mode 0666
EndSection

Section "Extensions"
Option "Composite" "Enable"
EndSection

Section "InputDevice"
Identifier "Keyboard-base"
Driver "kbd"
# Option "Device" "/dev/null"
Option "XkbRules" "xorg"
Option "XkbModel" "evdev"
Option "XkbLayout" "es"
EndSection

Section "InputDevice"
Identifier "Mouse-base"
Driver "mouse"
Option "Device" "/dev/null"
EndSection

Section "Device"
Identifier "Card0"
BoardName "ATI Technologies Inc RV370 5B60 [Radeon X300 (PCIE)]"
Driver "ati"
BusID "PCI:1:0:0"
Option "Monitor-VGA-0" "Mon-VGA"
Option "Monitor-DVI-0" "Mon-DVI"
EndSection

Section "Monitor"
Identifier "Mon-VGA"
Option "DPMS"
EndSection

Section "Monitor"
Identifier "Mon-DVI"
Option "DPMS"
Option "RightOf" "Mon-VGA"
EndSection

Section "Screen"
Identifier "Screen-base"
Device "Card0"
Monitor "Mon-VGA"
DefaultDepth 24
Subsection "Display"
Depth 24
Modes "1280x1024" "1024x768"
Virtual 2560 1024
EndSubSection
EndSection

Section "ServerFlags"
# Even if mouse detection fails, X will start
Option "AllowMouseOpenFail" "yes"

# VT switching is disabled
Option "DontVTSwitch" "yes"

# X restart (Ctrl+Alt+Backspace) is disabled
Option "DontZap" "yes"
EndSection


The lines ...

Option "Monitor-VGA-0" "Mon-VGA"
Option "Monitor-DVI-0" "Mon-DVI"

... are to indicate which monitor is connected to each of the card video outputs.

You can eliminate some lines, such as those related to acceleration (dri, glx). As we will use Xephyr, the final result will not have 3D acceleration. In our case, that does not matter because the PC will be used on an office environment, mainly for administrative tasks.

The line ...

Virtual 2560 1024

... on the screen section is like a kind of bounding box containing the two monitor. As you can see, we have two 1280x1024 monitors in a side by side configuration.

If you restart the X system, you will have a big desktop across the two monitors.

Update (20080508): Comment out the "/dev/null" option in the mouse section. In the final configuration you will not need the base mouse anymore, but this line in this moment will let your desktop without mouse support.


Section "InputDevice"
Identifier "Mouse-base"
Driver "mouse"
-> Option "Device" "/dev/null"
EndSection


>> step II >>

Friday, February 15, 2008

Asus Eee PC: Install Ubuntu 8.04 on a USB stick

Ubuntu, the popular Linux distribution, is catching the attention of more and more people every day.

Many distributions today are available as live CD / DVD, so you can just test the new operating system with no modifications at all on your computer.

There are lots of tutorials and howtos on the web covering the topic of the installation, but our goal and the reason of this post is a bit different.

If you want to go ahead further than you can do just with a live distribution, then you will need to install the operating system on your computer. Maybe you want to start using the new system while maintaining the previous one, and I mean a full use (update packages, install applications, install additional drivers to test if your hardware is supported, and so on).

If you do not want to mess with your hard disk partitions and you only have one hard disk available (as laptop owners have), then you should consider to install the system on an external device.

Luckily we have today many options available such as USB disks, USB memory or even memory cards that can act as boot devices. Those devices are available today at cheap or moderated prices.

We have a laptop: The popular Asus Eee PC with its original operating System (a customized version of Xandros). We want to install Ubuntu (Ubuntu 8.04 alfa 4) on the laptop but we do not want to remove the original system. We will use a 8GB USB memory as the target device where new the operating system will be installed.

Prepare the media containing the live CD installation disk. You can download Ubuntu as an .iso file to be recorded on a CD (DVD). Alternatively you can extract the files from the .iso to a USB memory and make it bootable. This way you will have a live USB with your Ubuntu distribution. You can find tutorials with instructions to do this.

I used an USB with only one big partition of 1GB. Then I resized it to 720MB obtaining a second one of about 260MB. That can be a good idea if you plan to do some work (such as creating documents or downloading from the web) since the second partition will be available in read + write mode. In my first trial I used an additional SD card just to store the screenshots of this tutorial. With two partitions on the live USB you can avoid the need of a second storage device even if you want to take screenshots.

Plug your live USB and boot your computer. If you are doing this on the Eee PC, just press the Esc key in the first screen to choose which device to boot from. Wait until the live system is fully loaded and running.


Plug the target USB memory (where you are going to install the operating system). In this case I used one having 8GB, but the default install takes less than 2GB. I do recommend to use one having at least 4GB (you are going to need additional space for your files, to download package updates, to install additional applications, ...) or you will have almost no free space.

Click on the install icon.


Choose your prefered language, your timezone and the keyboard layout. When asked to prepare disk space, choose to manually partition the disk.


I do recommend to create partitions. This is an optional step and you can use the whole disk without partitions, but if you plan to update / upgrade your system it may be convenient to have separated partitions to mount the /boot and /home directories. Create the partitions on the desired media according to your preferences.


In particular, I have done three partitions: ~100MB (/boot), ~6GB (/), and ~2GB (/home)


Rmember to choose a filesystem without journaling (i.e. avoid using ext3). I have used ext2 on all filesystems.


The system may present you some warnings about "incompatible features", "uncorrected errors" or lack of "swap partition". You can ignore these warning and follow to the next step.


Then, you will be asked for some personal data to create your account on the system


The system looks for previous data. It this is a first install it will find nothing to import.


Ready to install. Be extremelly careful in this step. If you just choose to continue, the installer will modify the MBR of your main disk (the SSD containing the original Xandros or whatever you installed on your disk).


This is the lower part of the window, with the Advanced... button:


Choose the correct location (hd0) is the SSD, use the item corresponding to your media, such as: (hd1), /dev/sdc, or whatever else.


Once decided whether to use a boot manager and its location, the installation begins.


Be patient. Flash disks are not as fast as a clasical HD. The installation process will take a lot of time.

Before rebooting the system, check /boot/grub/menu.lst If your boot device is not the SSD the references to your device will be wrong. Replace (hd2,0) or (hd1,0) by (hd0,0). When you boot from the removable media, this media is seen as hd0 by the system.

Once finished, you can finally boot on your newly installed device


Versión en español: Instalar Ubuntu 8.04 en una memoria USB

Wednesday, February 13, 2008

Video of Ubuntu 8.04 multiseat computer

At last, the prototye of the Ubuntu 8.04 multiseat computer is already running.

We started working on that prototype with the alfa 2 version, and currently it runs under the alfa 4 one. During this time many bugs have been fixed and what seemed impossible to achieve one month ago, is a working computer right now.

In this moment, we have a computer usable and apparently stable. Two people can use (share) simultaneously the computer, and this one uses only one graphic card (the same as we did in our first trial).


There are still some minor bugs and limitations, but we hope that things will keep improving in the two remaining months until the publication of the final release.

Monday, January 28, 2008

Coming soon: Multiseat in Ubuntu 8.04

In three months the guys of canonical are releasing the next Ubuntu version. As they did with the 6.06, the 8.04 is a LTS (Long Term Support) version. That ensures three years of support (updates, security fixes, etc), so these versions are ideal for sites intended to be working for a very long period of time with a minimal maintenance (i.e. no intentions to do major version upgrades but only keeping up to date the original version).


There are several changes that affect to the current multiseat configuration. The goal is just the same as it was in our fist multiseat configuration (using Ubuntu 6.06): To obtain two seats using just one graphic card with two video outputs.

The Ubuntu 8.04 release includes xorg 7.3 with some important changes compared to previous versions. The main advantage of that version is that the xserver-xephyr package includes support for evdev input events. We finally can obtain a full multiseat computer just doing some modifications in configuration files, and with no need of external patches. That eases the setup of the system as well as it avoids problems in the process of package updating.

Another relevant change is the use of xrandr instead of xinerama to manage the multiple outputs of a video card. At the begining that was a problem until we found a way to obtain the same as we did on the previous version: Showing a xephyr session on every screen.

We have been doing several tests with Ubuntu 8.04 alfa 2 and alfa 3. The result is a working prototype but we are still having some issues to fix. The fact of working with alfa and prerelease versions means to deal with additional problems, but we are confident in obtaining an easy to follow step by step tutorial to create a two seat computer when the final 8.04 version will be released.

Saturday, May 05, 2007

Multiseat in Ubuntu 7.04

The multiseat computer configuration has been carried out again on a new computer with the Ubuntu 7.04 release.


The main difference in this installation is that a brand new computer has been used. The computer was equiped with a PCI-Express card (nVidia 6600), instead of using an AGP card as we did in our first installation.


The big news are that the problems related to keyboard configuration seem to be solved. The page related to gdm and xkb has been updated with instructions on how to solve the keyboard missconfiguration problem reported by several users.


Update (20080114): Pics added. The pics were taken on 20070518

Wednesday, November 01, 2006

Google Maps + SIGPAC: Spain in high definition

Interesting development carried on based on two very useful products. By the combination of each one's advantages, the result is a product that avoids the limitations of each separate one.

On one side, Google Maps: The well known application offering satellite images (among other features) of the whole planet. This product has a nice interface very easy to use. Its only limitation, the areas in some countries (in this case, Spain) still not available as high resolution imagery.

On the other side, SIGPAC, the geographical information system from the Spanish Ministerio de Agricultura, Pesca y Alimentación. This application is publicly available, and it allows viewing ortophotos of the whole country in high detail level. The main drawbacks, are the images being a bit aged and a user interface suffering from some limitations.


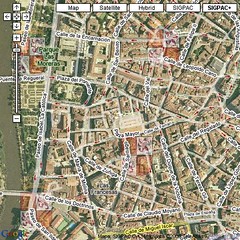
The solution: just to combine the best of the two systems. Let the Google Maps interface use the SIGPAC maps when viewing areas not available in high detail level, and to continue using the original Google Maps imagery when available in high detail.

Best of all, is that even using external maps (such as the SIGPAC ones), we can still combine the additional information coming from Google Maps. This way, we can see street and route maps properly placed all over the SIGPAC images.

Here, you can view the mix Google Maps + SIGPAC

Spanish version of this story here

Friday, October 20, 2006

Multiseat in Mandriva 2007

I was on the web, looking for information on Xephyr, when I accidentally discovered an interesting feature. The Mandriva 2007 Linux distribution includes in the standard repositories a version of Xephyr with evdev support.

In the changelog, you can find that the 'evdev' patch has been included:


* Tue Jul 04 2006 Gustavo Pichorim Boiko <..mail@removed..>
+ 2006-07-03 11:05:06 (38323)
- Removed the FIXME lines. All fixed.
- Added a patch providing evdev support for the Xephyr kdrive server. It is used
for multihead/multiseat solutions


So, I now have an additional TO DO in my pending tasks: Test if a multiterminal configuration can be obtained using a standard distribution without additional external packages or patches. Maybe Mandriva 2007 will be the first affirmative answer.

Saturday, September 09, 2006

Multiseat (VI): Final notes

(...comes from step V)


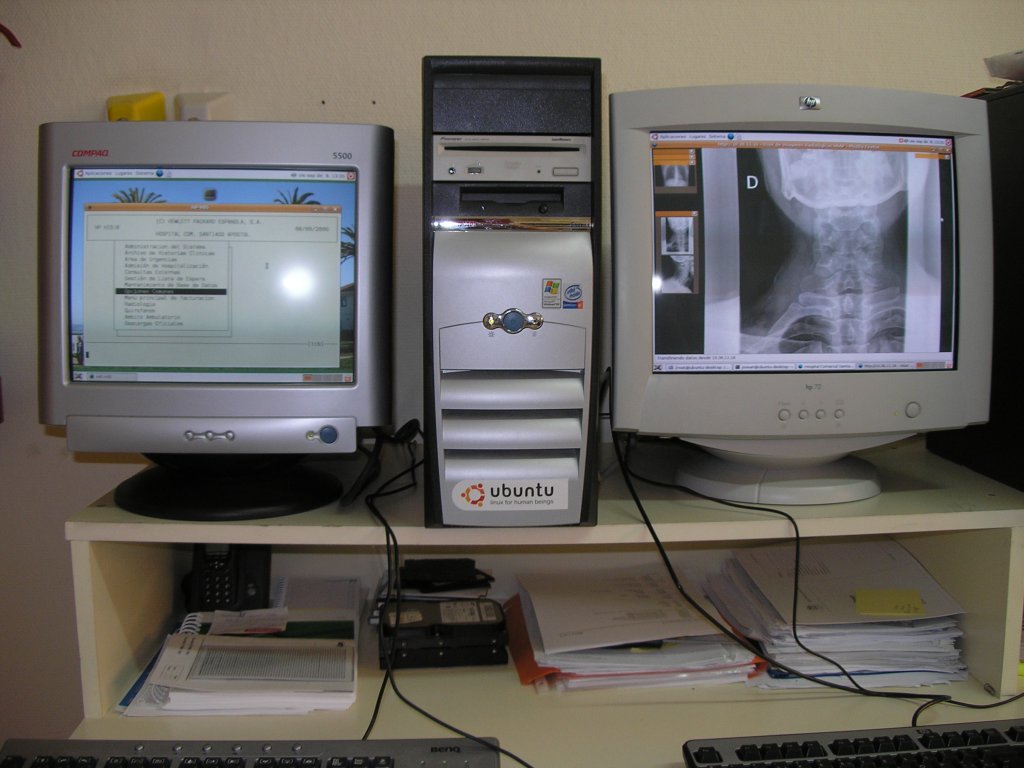
This project is just an evaluation prototype. It has been developed in a Hospital environment to determine if the computer on every medical examination room can be used simultaneously by two people.

Currently there is a computer on every examination room. Through the computer, some administrative tasks related to the patient are carried on by a nurse. There is also a web based information system, used by the physician to access to the medical information of every patient.

The goal is to share the same computer for administrative and medical tasks simultaneously (that is why only two seats are necessary in our case study) and evaluate the opinions of the final users about the new system.

Friday, September 08, 2006

Multiseat (V): gdm and xkb

(...comes from step IV)


The next step is to configure gdm to indicate how to execute Xephyr.sh (the wrapper script). The call includes a couple of parameters (display and xauthority) that will be converted to environment variables . The other pair of parameters are the physical addresses of the input devices, that will be converted to the event numbers to be used as keyboard and mouse events.


# cp /etc/gdm/gdm.conf /etc/gdm/gdm.conf.bak
# vi /etc/gdm/gdm.conf


Only the servers section of the gdm.conf file is shown

[servers]

0=Xephyr0
1=Xephyr1
2=Xephyr2

[server-Xephyr0]
name=Xephyr0
command=/usr/bin/X -ac -br
handled=false
flexible=false

[server-Xephyr1]
name=Xephyr1
command=/usr/sbin/Xephyr.sh -display :0.0 -xauthority /var/lib/gdm/:0.Xauth -fullscreen -kbdphys isa0060/serio0/input0 -mousephys isa0060/serio1/input0 -use-evdev
handled=true
flexible=false

[server-Xephyr2]
name=Xephyr2
command=/usr/sbin/Xephyr.sh -display :0.1 -xauthority /var/lib/gdm/:0.Xauth -fullscreen -kbdphys usb-0000:00:1d.1-1/input0 -mousephys usb-0000:00:1d.1-2/input0 -use-evdev
handled=true
flexible=false


Notice theat the command lines have been split for better readability.

Right now, you already have a multiseat computer. If you start the graphic mode, you will see the two monitors showing the gdm login screen.

# /etc/init.d/gdm start


In this moment there is only one problem remaining: To be able to obtain a proper configuration of the keyboards.

According to messages in several forums on Internet, evdev seems to have some problems still waiting to be patched related to keyboard configuration. Some options are ignored, some others can lead to a fully missconfigured keyboard (no one key mapping to the correct one). After many hours looking for information, and dozens of trial-error tests with setxkbmap, we finally achieved to obtain a correct keyboard configuration.

The best solution is to create a keyboard configuration file for every Xephyr session (change the layout according to your particular locale):


# vi /etc/X11/xkb/X1-config.keyboard
model = "pc105"
keycodes = "evdev"
layout = "es"


# cp /etc/X11/xkb/X1-config.keyboard /etc/X11/xkb/X2-config.keyboard


Do never include this line rules = "evdev" in the Xn-config.keyboard file. Every test we did (and we did really lots of tests!) having such line present, the result was a useless keyboard with no correct keys at all!

Update (4-May-2007): Since we are using a Xephyr compiled on another distribution, there seem to be an issue with the directories, and some configuration files can not be found. Including these additional lines, you can avoid all the keyboard related problems:

# ln -s /usr/share/X11/xkb /usr/lib/X11/xkb
# cp /etc/X11/xkb/X*.keyboard /usr/lib/X11/xkb
# cp `which xkbcomp` /usr/lib/X11/xkb
# mkdir /usr/lib/X11/xkb/compiled


Launch again the gdm, and have a coffee break. Your new toy is ready to play with!

(continues on step VI...)

Multiseat (IV): evdev and Xephyr

(...comes from step III)


What is evdev?


evdev is the generic input event device driver. It passes the events generated in the kernel (since version 2.6.8) straight to the program, with timestamps.

The evdev driver is able to separate and distinguish events coming from different keyboards and mouses plugged into the computer. The xorg supports evdev input driver module since version 6.9/7.0 . This way, it can get separated input events coming from every seat (keyboard and mouse pair) on the system.


This is a great step compared to previous multiseat solutions, since it makes possible to have multiterminal systems without having to patch neither the kernel nor the X server.

What is Xephyr?

Xephyr is a kdrive based X Server which targets a window on a host X Server as its framebuffer. In other words, it is a piece of software which creates a X server on top of another X server. That will allow us to run as many Xephyr instances as seats we have in our system. Every Xephyr instance will cover the area shown in a given display, and finally, evdev will allow us to separate the different input devices.
The good news

Xephyr is included in the universe repository from Ubuntu.

The bad news

The Xephyr version included in the Ubuntu repository, does not support evdev. I hope in a near future Xephyr comes with evdev upport.

Right now, you will have either to patch the Xephyr sources and compile it, or download an already patched solution. Download links for both solutions are available here.

# wget http://www.c3sl.ufpr.br/multiterminal/howtos/xephyr-precompiled.tar.bz2
# tar -xjf xephyr-precompiled.tar.bz2 --directory /usr/local/

Now it is time to plug your second set of keyboard and mouse. The evdev driver will access the input coming from every device by means of a given event in the form of /dev/input/eventNN. You must obtain the event id associated to every input device.

A new problem arises, since the event number assigned can change (in fact, it changes) between different boots. To solve this problem we well use a wrapper script. The script is the same as proposed here, but modified in order to obtain the event number given the physical connection of the device. We are assuming that the devices will be always plugged in the same position (you can label the back connectors to remember the correct position). Since the physical device addresses do not change between boots, the script can obtain the corresponding event id and match it properly with one physical keyboard or mouse.

Input devices and events, once plugged the second keyboard and mouse:

# cat /proc/bus/input/devices
I: Bus=0011 Vendor=0001 Product=0001 Version=ab41
N: Name="AT Translated Set 2 keyboard"
P: Phys=isa0060/serio0/input0
S: Sysfs=/class/input/input0
H: Handlers=kbd event0
B: EV=120013
B: KEY=4 2000000 3802078 f840d001 f2ffffdf ffefffff ffffffff fffffffe
B: MSC=10
B: LED=7

I: Bus=0011 Vendor=0002 Product=0005 Version=0000
N: Name="ImPS/2 Generic Wheel Mouse"
P: Phys=isa0060/serio1/input0
S: Sysfs=/class/input/input1
H: Handlers=mouse0 event1 ts0
B: EV=7
B: KEY=70000 0 0 0 0 0 0 0 0
B: REL=103

I: Bus=0010 Vendor=001f Product=0001 Version=0100
N: Name="PC Speaker"
P: Phys=isa0061/input0
S: Sysfs=/class/input/input2
H: Handlers=kbd event2
B: EV=40001
B: SND=6

I: Bus=0003 Vendor=0d62 Product=001c Version=0202
N: Name="Darfon USB Combo Keyboard"
P: Phys=usb-0000:00:1d.1-1/input0
S: Sysfs=/class/input/input5
H: Handlers=kbd event4
B: EV=120003
B: KEY=10000 7 ff87207a c14057ff febeffdf ffefffff ffffffff fffffffe
B: LED=7

I: Bus=0003 Vendor=0d62 Product=001c Version=0202
N: Name="Darfon USB Combo Keyboard"
P: Phys=usb-0000:00:1d.1-1/input1
S: Sysfs=/class/input/input6
H: Handlers=kbd event5
B: EV=3
B: KEY=3078 d801d101 1e0000 0 0 0

I: Bus=0003 Vendor=046d Product=c03f Version=2000
N: Name="Logitech USB-PS/2 Optical Mouse"
P: Phys=usb-0000:00:1d.1-2/input0
S: Sysfs=/class/input/input8
H: Handlers=mouse1 event3 ts1
B: EV=7
B: KEY=f0000 0 0 0 0 0 0 0 0
B: REL=103


The Name section will help us to identify the device. The Phys section is the parameter that we will send to the wrapper script in order to start every Xephyr instance.

The Xephyr wrapper

Now, it is time to create the wrapper script. The original one is modified to obtain the event numbers from the physical addresses

# vi /usr/sbin/Xephyr.sh


This is the final wrapper script:

#!/bin/bash

# 20060905 - josean - added get_event() function to obtain eventNN from a physical address
# Original version:
# http://en.wikibooks.org/wiki/Multiterminal_with_Xephyr
# http://www.c3sl.ufpr.br/multiterminal/howtos/Xephyr.sh

trap "" usr1

XEPHYR=/usr/local/bin/Xephyr

get_event()
{
evento=`grep -A2 $1 /proc/bus/input/devices | grep 'H: Handlers=' | grep --only-matching -e 'event[0-9]*'`
}

args=()

while [ ! -z "$1" ]; do
if [[ "$1" == "-xauthority" ]]; then
shift
if [ ! -z "$1" ]; then
export XAUTHORITY="$1"
fi
elif [[ "$1" == "-display" ]]; then
shift
if [ ! -z "$1" ]; then
export DISPLAY="$1"
fi
elif [[ "$1" == "-kbdphys" ]]; then
shift
if [ ! -z "$1" ]; then
get_event $1
args=("${args[@]}" "-keyboard")
args=("${args[@]}" "/dev/input/$evento")
fi
elif [[ "$1" == "-mousephys" ]]; then
shift
if [ ! -z "$1" ]; then
get_event $1
args=("${args[@]}" "-mouse")
args=("${args[@]}" "/dev/input/$evento,5")
fi
else
if ! expr match $1 'vt[0-9][0-9]*' >/dev/null; then
args=("${args[@]}" "$1")
fi
fi

shift
done

# echo $XEPHYR "${args[@]}" >> /tmp/logXephyr

exec $XEPHYR "${args[@]}"


Finally, be sure to allow the script to be executed.

# chmod +x /usr/sbin/Xephyr.sh


(continues on step V...)

Thursday, September 07, 2006

Multiseat (III): xorg.conf

(...comes from step II)

Changes on the xorg.conf file

Since the system automatically generated a correct configuration file, this step is not really necessary. Anyway, if you need to obtain information about the bus in which your card is plugged, the lspci command will give you such data.

Obtaining the information for the graphic card.

# lspci | grep VGA
0000:01:00.0 VGA compatible controller: nVidia Corporation NV34 [GeForce FX 5200] (rev a1)


Before making any change, it is advisable to make a backup of the original configuration file. Then edit it using your favorite text editor.

# cp /etc/X11/xorg.conf /etc/X11/xorg.conf.bak
# vi /etc/X11/xorg.conf


The next step is the edition of the xorg.conf according to your configuration. In particular, we must create the corresponding device, monitor and screen sections for every seats.

Section "Files"
FontPath "/usr/share/X11/fonts/misc"
# FontPath "/usr/share/X11/fonts/cyrillic"
FontPath "/usr/share/X11/fonts/100dpi/:unscaled"
FontPath "/usr/share/X11/fonts/75dpi/:unscaled"
FontPath "/usr/share/X11/fonts/Type1"
FontPath "/usr/share/X11/fonts/100dpi"
FontPath "/usr/share/X11/fonts/75dpi"
# path to defoma fonts
FontPath "/var/lib/defoma/x-ttcidfont-conf.d/dirs/TrueType"
EndSection

Section "Module"
Load "bitmap"
Load "ddc"
# Load "dri"
Load "extmod"
Load "freetype"
Load "glx"
Load "int10"
Load "type1"
Load "vbe"
EndSection

# ------------------------------------------------------------------------
# Input devices
# ------------------------------------------------------------------------

Section "InputDevice"
Identifier "Keyboard-base"
Driver "kbd"
EndSection

Section "InputDevice"
Identifier "Mouse-base"
Driver "mouse"
Option "Device" "/dev/input/mice"
EndSection

# ------------------------------------------------------------------------
# Dual head system. Notice the two devices sharing the same BusID
# ------------------------------------------------------------------------

Section "Device"
Identifier "Card0.0" # CRT-0 (VGA output)
Driver "nvidia"
VendorName "nVidia Corporation"
BoardName "NV34 [GeForce FX 5200]"
BusID "PCI:1:0:0"
Screen 0
Option "NoLogo"
EndSection

Section "Device"
Identifier "Card0.1" # CRT-1 (Analog-DVI, DFP-0 : Digital-DVI)
Driver "nvidia"
VendorName "nVidia Corporation"
BoardName "NV34 [GeForce FX 5200]"
BusID "PCI:1:0:0"
Screen 1
Option NoLogo"
EndSection

# ------------------------------------------------------------------------
# Monitor section: Most of the parameters are optional
# ------------------------------------------------------------------------

Section "Monitor"
Identifier "Monitor0"
VendorName "HP"
ModelName "HP D8904"
Option "DPMS"
HorizSync 30-70
VertRefresh 50-160
DisplaySize 320 240 # CRT 17" (81 DPI @ 1024x768)
EndSection

Section "Monitor"
Identifier "Monitor1"
VendorName "Compaq"
ModelName "Compaq 5500"
HorizSync 30-54
VertRefresh 50-120
DisplaySize 280 210 # CRT 15" (72 DPI @ 800x600)
Option "DPMS"
EndSection

# ------------------------------------------------------------------------
# Screen section: Pairing video cards and monitors
# ------------------------------------------------------------------------

Section "Screen"
Identifier "Screen0"
Device "Card0.0"
Monitor "Monitor0"
SubSection "Display"
Depth 24
Modes "1024x768" "800x600" "640x480"
EndSubSection
EndSection

Section "Screen"
Identifier "Screen1"
Device "Card0.1"
Monitor "Monitor1"
SubSection "Display"
Depth 24
Modes "800x600" "640x480"
EndSubSection
EndSection

# ------------------------------------------------------------------------
# Layout section
# ------------------------------------------------------------------------

Section "ServerLayout"
Identifier "Multihead"
Screen 0 "Screen0" 0 0
Screen 1 "Screen1" LeftOf "Screen0"
InputDevice "Keyboard-base" "CoreKeyboard"
InputDevice "Mouse-base" "CorePointer"
EndSection

# ------------------------------------------------------------------------
# Additional sections
# ------------------------------------------------------------------------

# Xephyr can not use DRI, so it is not enabled
# Section "DRI"
# Mode 0666
# EndSection

Section "ServerFlags"
# Xinerama does not affect this configuration, so it is not enabled
# Option "Xinerama" "on"

# Even if mouse detection fails, X will start
Option "AllowMouseOpenFail" "yes"

# VT switching is disabled
Option "DontVTSwitch" "yes"

# X restart (Ctrl+Alt+Backspace) is disabled
Option "DontZap" "yes"
EndSection


If everything was OK, when you log into your computer, you should have either two independent adjacent desktops (Xinerama disabled) or a bigger desktop extended through the two monitors (Xinerama enabled)

Do not worry in this moment about configuring your keyboard layout. This X configuration will not be seen by the final user of the system. The only goal in this moment is to define properly your video hardware in order to have the two monitors working simultaneously.

Take into account that the login greeter will appear in only one of the screens, but as soon as you log into the system you will see your desktop along the two screens.

The next step is to create a true multiseat computer. We will use Xephyr: A software able to act as an intermediary between the input devices and the underlying X.

(Continues on step IV...)

Multiseat (II): Let's start

(...comes from step I)


Step by step installation

Requirements

First of all, obviously, we need the hardware. In the prototype here presented, we had this configuration
  • Computer: Pentium IV 2.0GHz, 512MB RAM, 20GB hard disk
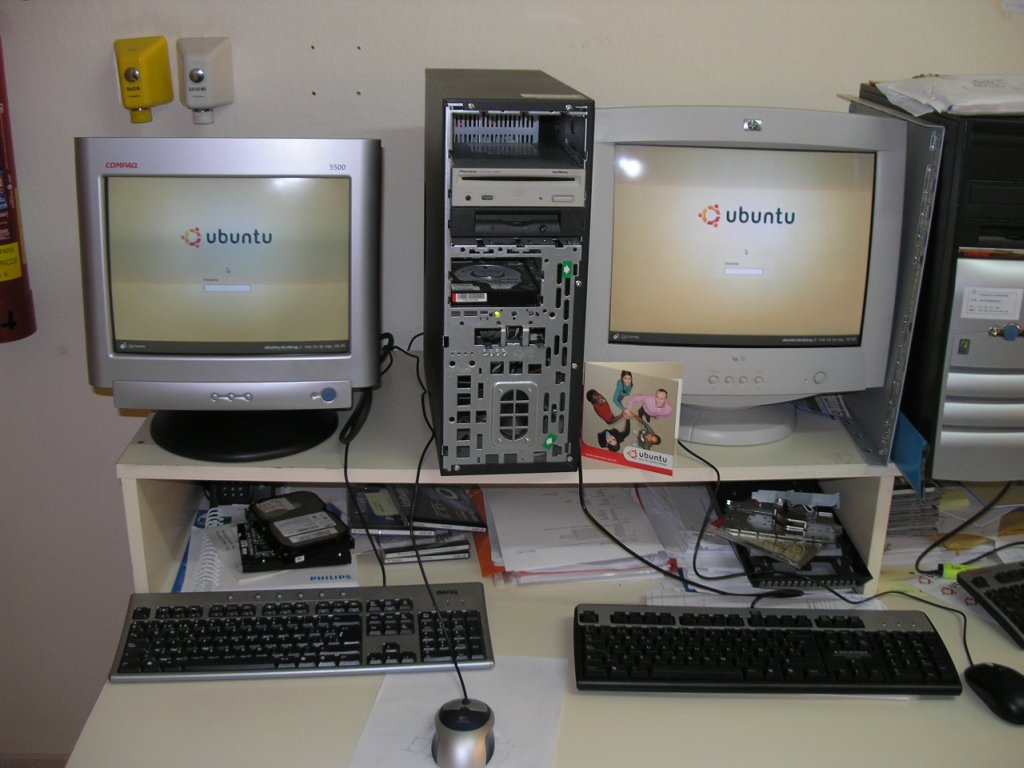
  • Graphic card: nVidia GeForce 5200 AGP 8x, 128MB, VGA + DVI + TV outputs (the blue one on the picture)
  • Seat 1: PS/2 keyboard and mouse, 17" CRT monitor (the right one in the photo)
  • Seat 2: USB keyboard and mouse, 15" CRT monitor (the left one)

Additional requirements:
  • Network connection to a second computer, in order to have remote access during the configuration of the system (It is also possible to do without an additional computer, but this option is not recommendable at all).
  • Internet access, to download drivers, additional packages, and (optionally) to keep updated the system.

Standard Ubuntu install

In this step it is not necessary to have all your hardware plugged. If you have only a set of KVM (keyboard, video, mouse), that is enough right now. We used a PS/2 keyboard and a PS/2 mouse, and a VGA monitor plugged in the VGA output of the graphic card. Nothing special at the moment.

Insert the Ubuntu CD. The CD of the 6.06 version is a live one, which offers the possibility of being installed on youy hard drive.

Follow the instructions and Install Ubuntu on your hard drive. Your hard drive will be deleted and its contents will be lost. Any spyware and virus you may previously have there, will be lost.

After the installation if everything was OK, you should have an Ubuntu with the X working properly on one of your monitors.

Before going into the next step, we recommend you to enable the root account. May be this is against the philosophy of Ubuntu, but it can be annoying to type sudo just before each command when you have to change many things at one time, such as in this project. After this step, the next commands will have to be executed as the root user. Otherwise, you will have to prepend sudo to all the commands needing root access.

$ sudo passwd root


If you want to make changes from another computer in your network, you must install a SSH server

# apt-get install openssh-server


The next step is to download the binary drivers from nVidia, because of limitations of the open source ones in graphic cards having more than one output.

# apt-get install nvidia-glx


Multihead install

Now it is time to plug the second monitor and modify your system configuration editing your xorg.conf file

(Continues on step III...)